Exposing PyTorch models over a containerised API

It has been a really interesting year so far for data science, specifically with the release of OpenAI’s GPT-2 (a model that can generate realistic text in a variety of styles). The other day curiosity got the best of me and I decided to take a look into ways I could make use of the model and expose its functionality in a less convoluted way.
The Outcome
To have a web application that allows users to put in a sentence of text. We will then return them a generated output based on the GPT-2 model. Below is an example of this where I’ve provided it with the opening line of the American Preamble.

The Problem (and a rant)
The issue I faced when trying to run this particular model (and I suppose most machine learning models) is that while code works nicely in a Data scientists perfectly setup Jupyter Notebook & Anaconda environment, there is more often then not a disconnect between the instructions in the README and the actual stuff that needs to be setup before even trying to run the code.

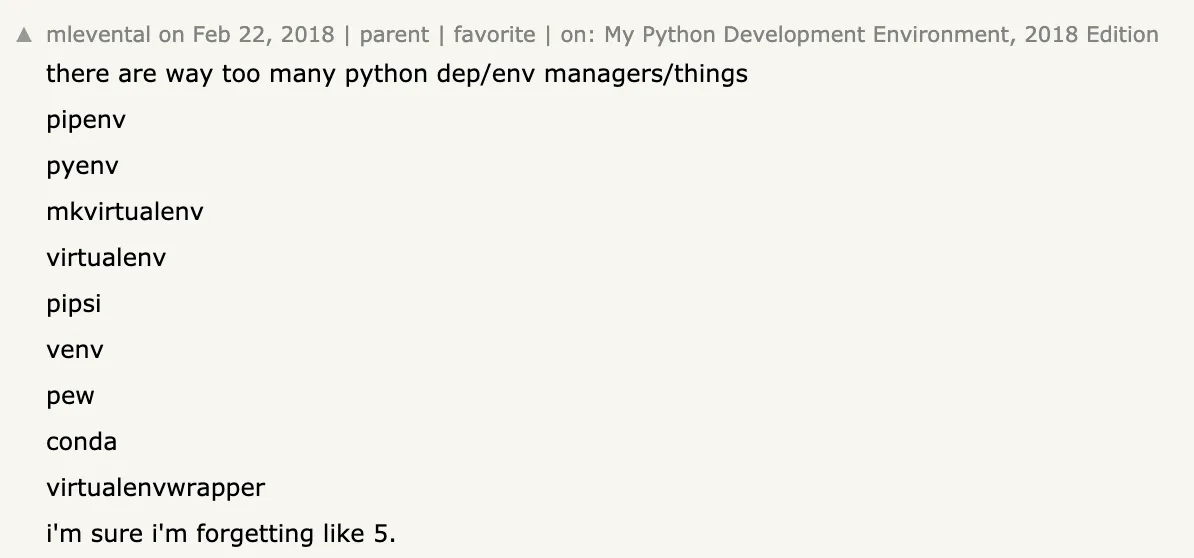
Developers are not really at fault here. Python has a messy footprint on most systems due to the way dependencies are managed. While this isn’t unique to Python, it is certainly amplified by maintainers not having a clear way of managing virtual environments.
Conda as its become the defacto way of managing Python environments by the data science community. Because of this it is what will be used in this post. For anyone not using Conda there is also a standard way to deploy using normal Python env.
The Codebase
Code for the post can be found at https://github.com/t04glovern/gpt-2-flask-api. It is recommended you pull it down and follow along so you have a good understanding of each piece. This can be done by either downloading the zip or running the following git command
git clone https://github.com/t04glovern/gpt-2-flask-api.git
There’s quite a few files included here and its important to understand what each of them are for. Before we do this however we have to pull down the GPT2 PyTorch model (~500mb) using the following command within the root directory of the repository
mkdir models
curl --output models/gpt2-pytorch_model.bin https://s3.amazonaws.com/models.huggingface.co/bert/gpt2-pytorch_model.bin
deployment
The deployment folder contains all the Python code that will be run and is the core of our service.
- deployment/GPT2 - A copy of the slightly modified GPT2 library written by Kyung Hee Univ in graykode/gpt-2-Pytorch.
- deployment/static - Web assets, including CSS, JS, Images and font packs that will be used by Flask and served in the browser.
- deployment/templates - HTML templates with jinja2 syntax
{{ variable }}. These are replaced with code defined in our python server side code. - deployment/utils.py - HTML and rendering utilities that are used to format text blocks before serving to the frontend
- deployment/run_server.py - Input to our program and where all the primary code is written. Also contains the Flask routes that handle web request to our service.
- environment.yml - Not specifically required for the python program to run, however it defines the python dependencies needed to run it. This is specific to Conda
- requirements.txt - Defines the pip requirements for the project. Useful if you are using just Python env and not Conda
In order to Setup a Python environment for this project, you can run the following commands within the root folder of the project.
python3 -m venv ./venv
source venv/bin/activate
pip install --upgrade pip
pip install -r requirements.txt
Then run the Flask app by running
cd deployment
python run_server.py
You should receive the following output indicating that the Flask server is up and running. This will also load in the PyTorch model (so make sure you downloaded it as defined in the first step)
* Loading model and Flask starting server...please wait until server has fully started
 * Serving Flask app "run_server" (lazy loading)
 * Environment: production
   WARNING: Do not use the development server in a production environment.
   Use a production WSGI server instead.
 * Debug mode: off
 * Running on http://0.0.0.0:5000/ (Press CTRL+C to quit)
Fire up a browser and navigate to http://localhost:5000. You should see a box prompting you to pass in a sentence to process. When you submit a sentence the loading bar in the console log indicates how far through processing the output is it. This process will run faster on CUDA enabled systems.
127.0.0.1 - - [21/Mar/2019 14:58:39] "GET / HTTP/1.1" 200 -
127.0.0.1 - - [21/Mar/2019 14:58:39] "GET /static/css/main.css HTTP/1.1" 304 -
127.0.0.1 - - [21/Mar/2019 14:58:39] "GET /static/images/background.jpg HTTP/1.1" 200 -
 45%|████████████████████████                                  | 137/512 [00:07<00:22, 16.67it/s]
docker
There are a number of docker related files in the project.
- .dockerignore - Exclude certain files and directories from being copied into the docker container when building.
- docker-compose.yml - Defines a set of containers that should be created. Docker compose is useful for orchestrating a number of containers as it lets you define how they interconnect. In our case however we use it to neatly define how the container we build should be run. This includes defining what port to expose, and what command to execute when the container starts.
- Dockerfile - The design specifications for our docker container. This file is like the instruction manual for how the container is created. It includes
- Files to be copied (copying in the PyTorch model for use within the container)
- Packages to be installed
- Conda environment setup (uses environment.yml to define packages to install)
To run the Docker version of this project first ensure that you have docker installed. Then run the docker-compose command below to bring up the container stack
docker-compose up --build flask
The --build flag here indicates that you want to re-build the image from scratch if it doesn’t already exist based on the Dockerfile specifications.
NOTE: The process to build can take quite a while, and will downloaded upward of a 1-2gb. Once built I would recommend not using the —build flag as it will only require a rebuild if changes are made to the container.
When you want to bring the container stack down, simply run the following to destroy the containers.
docker-compose down -v
cloudformation
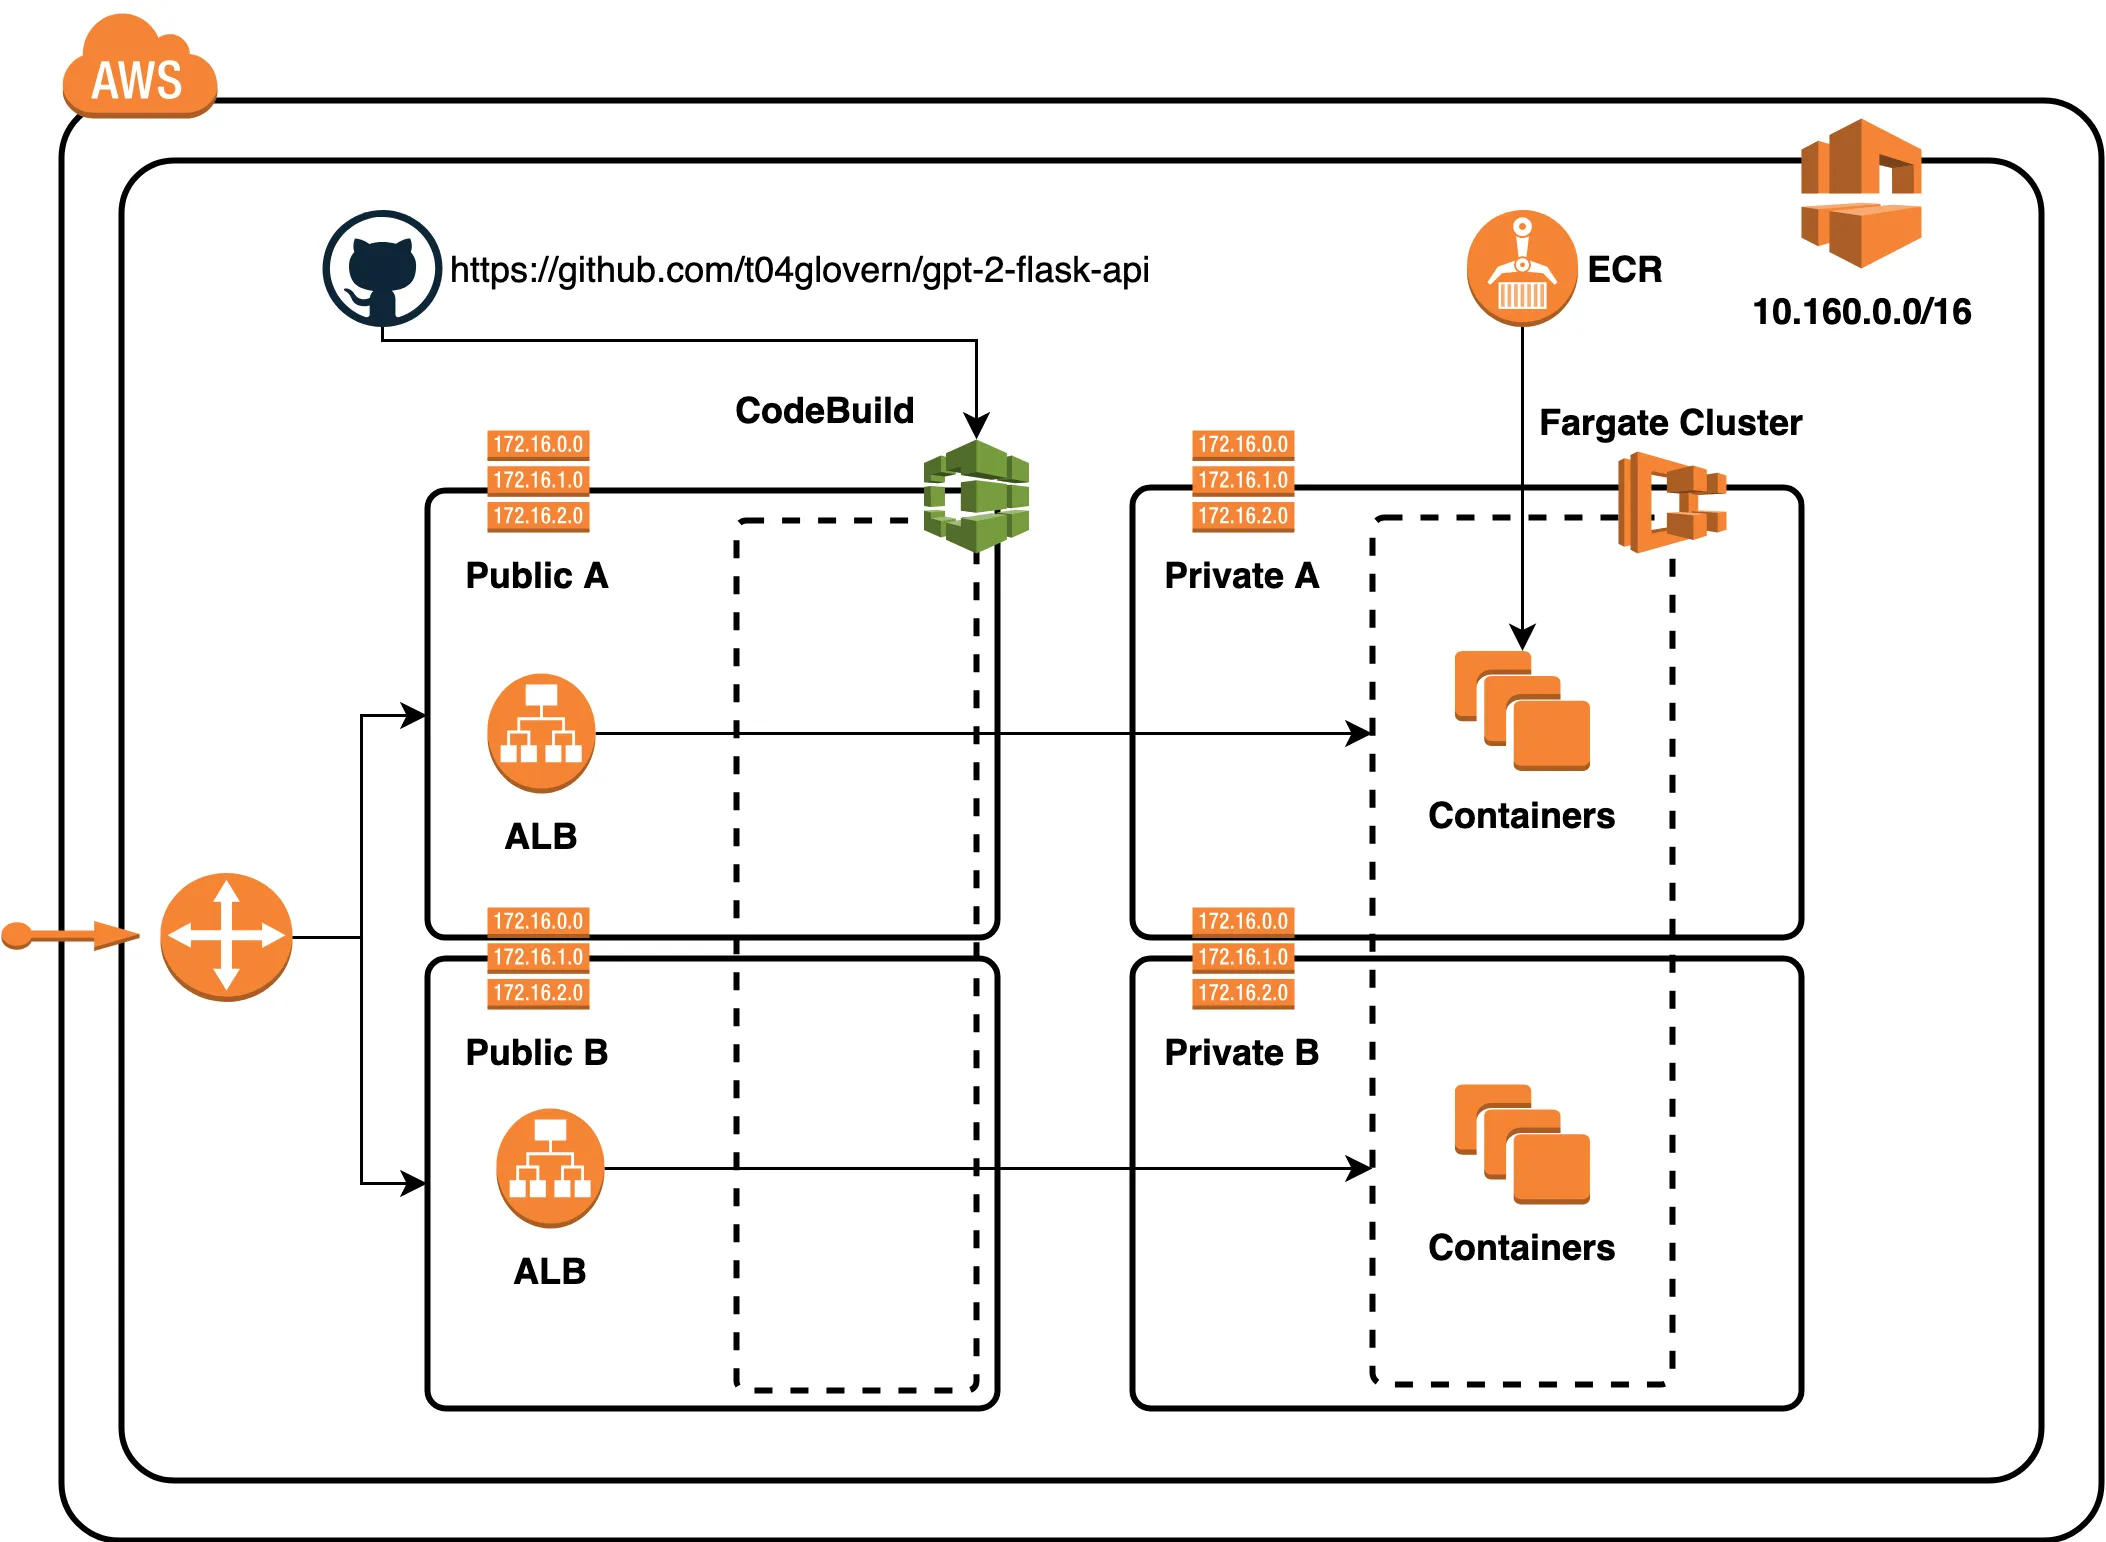
The final piece of this tutorial is deploying the working container to AWS Fargate. Fargate is a container platform that will run our service for us. We will be leveraging CloudFormation for the deployment of all the resources we need to run the service. The following network diagram summarises what is created based on the templates
To deploy the stack, you need to have the aws-cli setup and authenticated with your AWS Account. An S3 bucket has to be created in order to deploy the various stack components. I’ve created a script for this that you need to edit, simply change devopstar to your own bucket name (needs to be unique). The script will create the bucket for you.
#!/bin/sh

BUCKET_NAME=devopstar

## Creates S3 bucket
aws s3 mb s3://$BUCKET_NAME

## S3 cloudformation deployments
### Base
aws s3 cp cloudformation/base/fargate-cluster.yaml s3://$BUCKET_NAME/resources/gpt-2-flask-api/cloudformation/base/fargate-cluster.yaml
aws s3 cp cloudformation/base/fargate-service.yaml s3://$BUCKET_NAME/resources/gpt-2-flask-api/cloudformation/base/fargate-service.yaml
aws s3 cp cloudformation/base/vpc-networking.yaml s3://$BUCKET_NAME/resources/gpt-2-flask-api/cloudformation/base/vpc-networking.yaml
### CI/CD
aws s3 cp cloudformation/cicd/codebuild.yaml s3://$BUCKET_NAME/resources/gpt-2-flask-api/cloudformation/cicd/codebuild.yaml
Now create a ECR (container repository in AWS) using the following script. If you change the gpt-2-flask-api you need to ensure its updated everywhere. Again, this process will take quite some time to build and then push the image to AWS (over 4gb of network activity).
# Create ECR (if not already existing)
aws ecr create-repository --repository-name "gpt-2-flask-api"

ACCOUNT_ID=$(aws sts get-caller-identity |  jq -r '.Account')
$(aws ecr get-login --no-include-email --region us-east-1)

docker build -t gpt-2-flask-api .
docker tag gpt-2-flask-api:latest $ACCOUNT_ID.dkr.ecr.us-east-1.amazonaws.com/gpt-2-flask-api:latest
docker push $ACCOUNT_ID.dkr.ecr.us-east-1.amazonaws.com/gpt-2-flask-api:latest
Finally we are able to deploy the CloudFormation stack. Check the cloudformation/deployment-params.json file and update any parameters that might need changing after the previous steps (specifically the bucket name, and maybe the ECR repository name).
NOTE: If you push your own version of this repo to github you can also update the reference to your project here. Codebuild is just a nice bonus!.
Now you can run the following to create the stack
aws cloudformation create-stack \
    --stack-name "gpt-2-flask" \
    --template-body file://cloudformation/deployment.yaml \
    --parameters file://cloudformation/deployment-params.json \
    --capabilities CAPABILITY_IAM
Navigate to the CloudFormation console and get the Output variable ApiEndpoint, or run the following command to retrieve the variable from the CLI
aws cloudformation describe-stacks --stack-name "gpt-2-flask" \
    --query 'Stacks[0].Outputs[?OutputKey==`ApiEndpoint`].OutputValue' \
    --output text
Navigate to the url provided (will look something like the following: http://gpt-2-flask-api-lb-XXXXXXXXX.us-east-1.elb.amazonaws.com/) and you should be greeted with the sentence input screen from before!
Delete Stack
To Delete the stack we just created, simply run the following command.
aws cloudformation delete-stack \
    --stack-name "gpt-2-flask"
Attribution
There were quite a number of extremely helpful resources that I used to bootstrap this repository.
- https://github.com/WillKoehrsen/recurrent-neural-networks - Provided a fantastic baseline for dockerizing data science projects within Conda. Not only that but also provided a great structure for Flask APIs, UI and Form elements.
- Deploying a Keras Deep Learning Model as a Web Application in Python - Accompanying blog post for the previous attribution
- https://github.com/graykode/gpt-2-Pytorch - PyTorch implementation of GPT-2 model