Create a Private VPN using AWS IoT Button, SNS & CloudFormation
In one of our previous posts we went over Deploying a Private VPN to AWS EC2 using CloudFormation and although that was really cool, It certainly had some room for improvement.
Note: If you haven’t checked out the previous post, I would recommend giving it a skim / attempt before trying this one. It’ll give you more context about what we’re trying to achieve.
https://devopstar.com/2019/01/06/deploying-a-private-vpn-to-aws-ec2-using-cloudformation/
I picked up an AWS IoT Button from a colleague recently, and wanted to find a legitimate use for it (other then blinking an LED or sending a slack message.
There are plenty of guides online going over the setup of the button in question. However they all use the; arguably unreliable app to do the setup process for you. Not only that but they get you to create a bunch of certificates, policies and rules by hand, and I’m well know for hating UI interaction with a passion, so that didn’t seem overly appealing to me in the slightest.
Setup
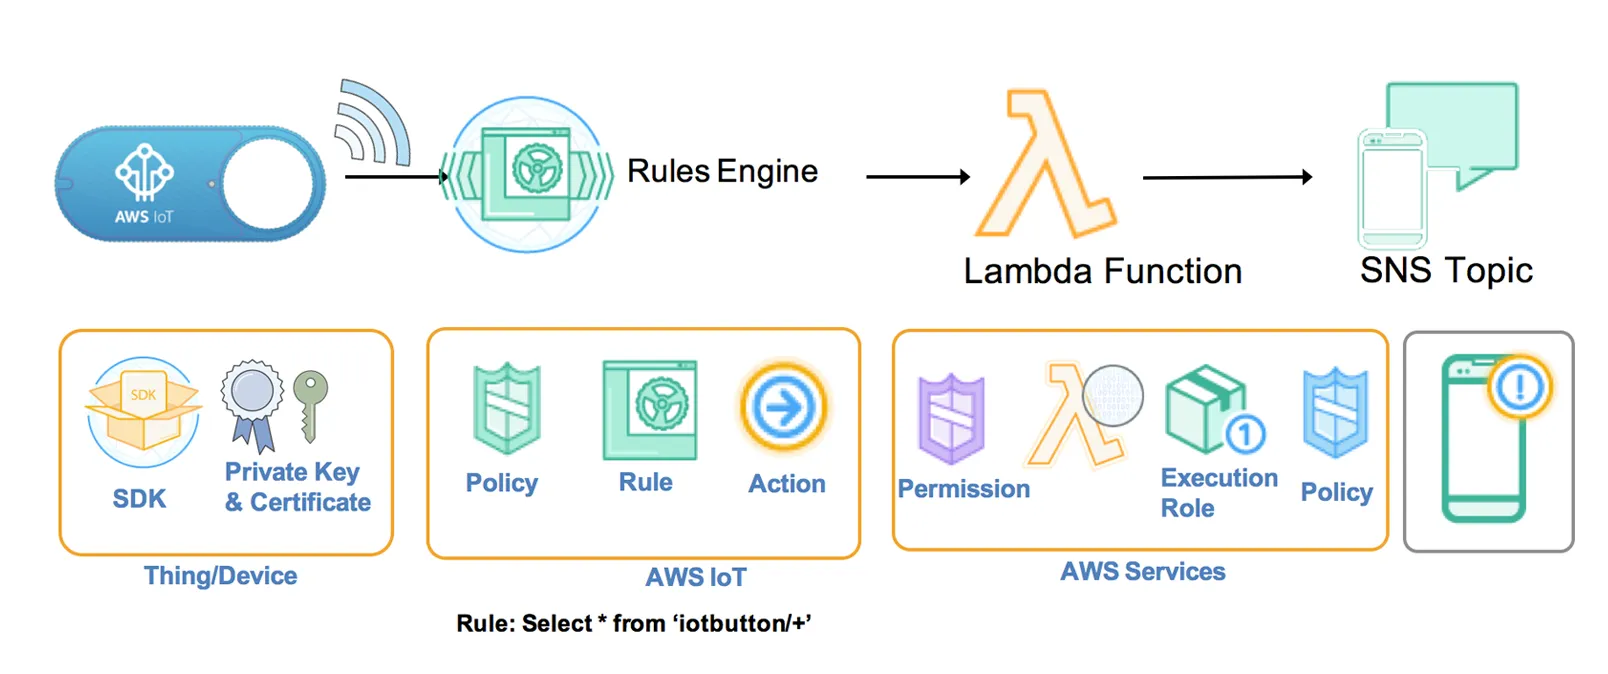
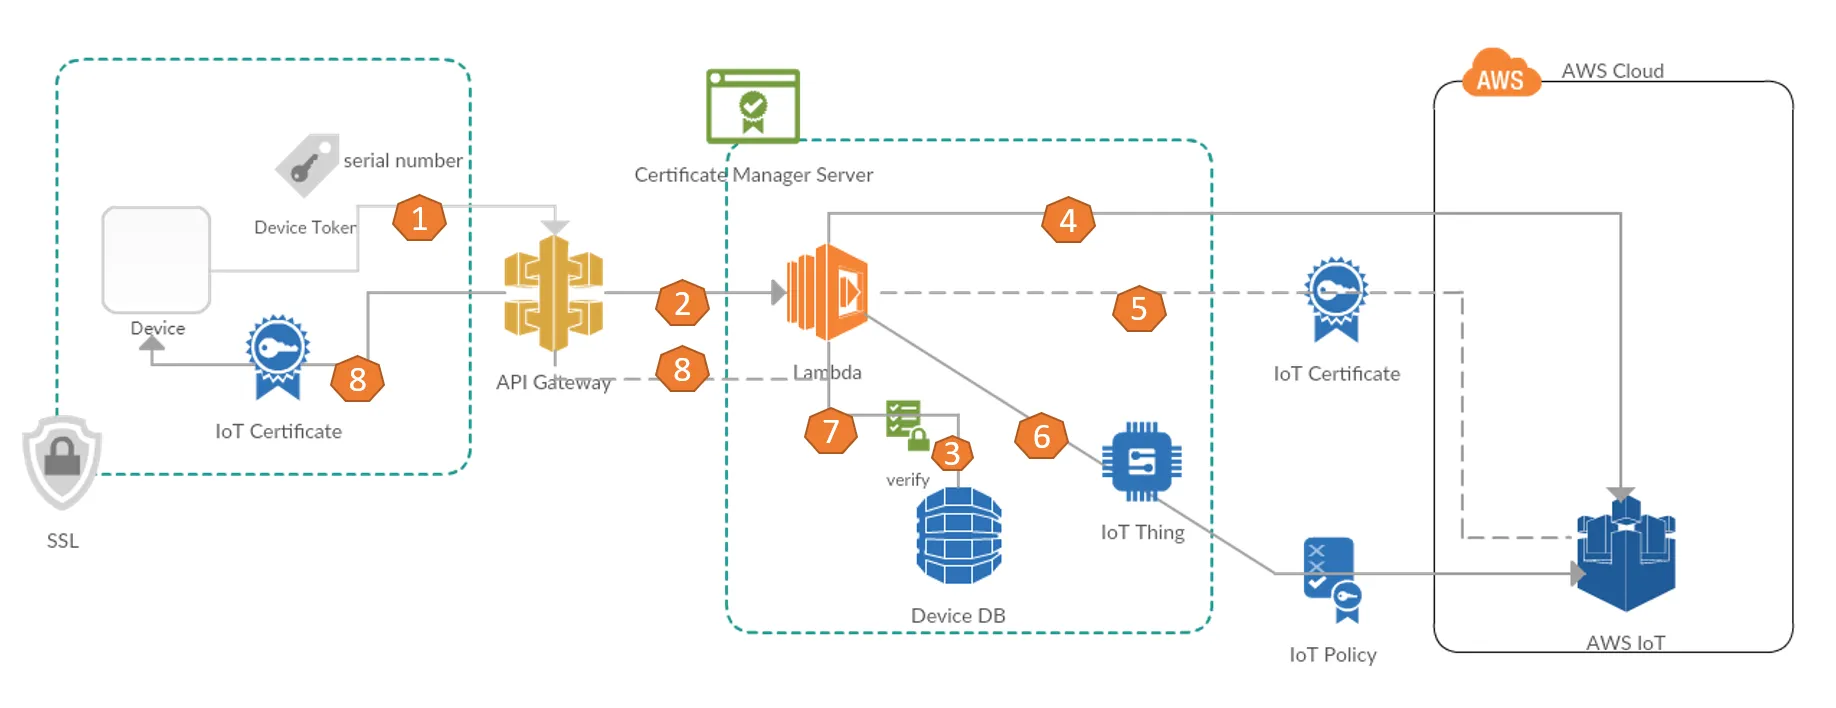
So the goal of this project is to have a CloudFormation stack created as an action when the AWS IoT Button is pressed. The high level architecture can be seen in the diagram below
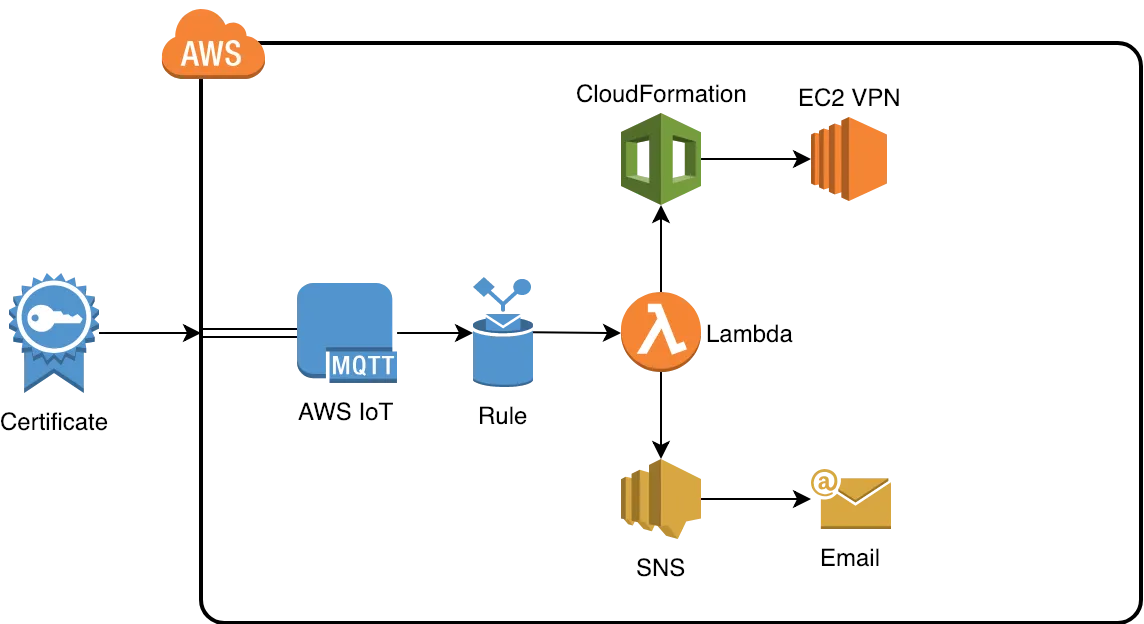
High level architecture diagram of the proposed solution
I’ve already written all the code you’ll need to deploy something like this. It can be found in the git repo t04glovern/aws-iot-vpn-spawner. You’ll need to pull down a local copy to work with as it also contains a submodule for t04glovern/aws-pptp-cloudformation which is the repo we used in the previous post to create a VPN using CloudFormation.
Start by pulling for the repository to your system
git clone https://github.com/t04glovern/aws-iot-vpn-spawner.git
We also need to utilize aws-pptp-cloudformation and therefore need to init the submodule in the project to use it.
cd aws-iot-vpn-spawner
git submodule init
IoT Certificate Vending Machine
At this point, we come to the fork in the road where I decided I didn’t like the generic setup that AWS recommends us follow when setting up the AWS IoT Button. We’re going to be deploying our very own Certificate Vending Machine (CVM).
You don’t need to know too much about the architecture of CVM, but it will help to know what problem it aims to solve. Generally when you create a new IoT Thing you are responsible for:
- Creating an AWS IoT Thing
- Creating an AWS IoT Certificate
- Creating an AWS IoT Policy
- Attaching the AWS IoT Certificate to the Policy
- Attaching the AWS IoT Policy to the Thing
The issues here is that its not conducive to helping people follow and maintain a common standard (e.g. Naming, Policy types), plus even if you aren’t using the UI, the series of commands you have to run to accomplish this isn’t super practical.
CVM allows us to submit a new Device to a DynamoDB table, then when we hit an API Gateway endpoint with the Device Serial number and a secret pre-shared key, it generates us a Certificate and handles the creation and policies for us in the background.
Certificate Vending Machine Deploy
To deploy your very own Certificate Vending Machine stack, you will first need to place the Lambda function in a bucket somewhere. I’ve put it in my S3 bucket using the following
aws s3 cp aws-iot-cvm/iot-cvm.zip s3://devopstar/resources/aws-iot-vpn-spawner/iot-cvm.zip
Where ever you chose to put it, you must update the parameters in the aws-iot-cvm/iot-cvm-params.json file to align with yours.
{
    "ParameterKey": "LambdaCodeBucket",
    "ParameterValue": "devopstar" # Bucket Name
},
{
    "ParameterKey": "LambdaCodeS3Key",
    "ParameterValue": "resources/aws-iot-vpn-spawner/iot-cvm.zip" # Code Location
}
Now we’re ready to deploy the CloudFormation stack, you can do so with the following command
aws cloudformation create-stack --stack-name "devopstar-iot-cvm" \
    --template-body file://aws-iot-cvm/iot-cvm.yaml \
    --parameters file://aws-iot-cvm/iot-cvm-params.json \
    --capabilities CAPABILITY_IAM
You can get details, including your API Endpoint for adding new IoT devices by running the following on your newly created stack
aws cloudformation describe-stacks --stack-name "devopstar-iot-cvm" \
    --query 'Stacks[0].Outputs[?OutputKey==`RequestUrlExample`].OutputValue' \
    --output text

# https://xxxxxxxx.execute-api.us-east-1.amazonaws.com/LATEST/getcert?serialNumber=value1&deviceToken=value2
Now we need to create an entry in the DynamoDB database that was created for us to manage our IoT Devices. Run the following command (ensure that the --table-name matches the one in your aws-iot-cvm/iot-cvm-params.json file).
You should also provide:
- serialNumber - a unique identifier for your device
- deviceToken - a secret pre-shared key that you will use in the next step to verify you’re authorised to create certificates
aws dynamodb put-item \
    --table-name iot-cvm-device-info \
    --item '{"deviceToken":{"S":"secret_key"},"serialNumber":{"S":"devopstar-iot-btn-01"}}'
Now, you need to make a request to the API Gateway endpoint you received before. Make sure the request you make contains the correct serialNumber and deviceToken pair.
Note: I recommend opening this link in a browser and saving the results that way. I have had mixed success using wget / curl
https://xxxxxxxx.execute-api.us-east-1.amazonaws.com/LATEST/getcert?serialNumber=devopstar-iot-btn-01&deviceToken=secret_key
You’ll be returned a json response similar to the one below:
{
    "certificateArn": "arn:aws:iot:us-east-1::cert/009f.........",
    "certificateId": "009ff......",
    "certificatePem": "-----BEGIN CERTIFICATE-----\nMIIDW......-----END CERTIFICATE-----\n",
    "keyPair": {
        "PublicKey": "-----BEGIN PUBLIC KEY-----\nMIIBIj.......-----END PUBLIC KEY-----\n",
        "PrivateKey": "-----BEGIN RSA PRIVATE KEY-----\nMI........-----END RSA PRIVATE KEY-----\n"
    },
    "RootCA": "-----BEGIN CERTIFICATE-----\r\nMIIE0zCC........-----END CERTIFICATE-----"
}
Place the outputs for each of the two fields below into new files in config/
- config/iot-certificate.pem.crt: certificatePem
- config/iot-private.pem.key: keyPair.PrivateKey
Annoyingly you’ll have to remove the newline delimiters with actual newlines. I usually use a _\\n_ -> _\n_ regular expression find and replace in VSCode. I’d like to come up with a better way of handling this in the future.

AWS IoT Button Configure
Now that we have the certificate for our device, we need to configure our AWS IoT Button. There are two ways (without the App) that we can do this, the second approach is a little more unreliable but it fully programmatic.
Before we do this, retrieve your endpoint under the Settings > Custom Endpoint section of AWS IoT. It should look something like the following (note the region you are using needs to match the region you deployed your CVM to).
xxxxxxxxxxxx-ats.iot.us-east-1.amazonaws.com
Next, hold the button down on your IoT Button for 5+ seconds until the blue light starts blinking. Connect to the WiFi Host-spot that your Button starts broadcasting
It should have an SSID like: Button ConfigureME - GE3. The Password is the last 8 digits of your DSN (on the back of the button or on the box it came in).
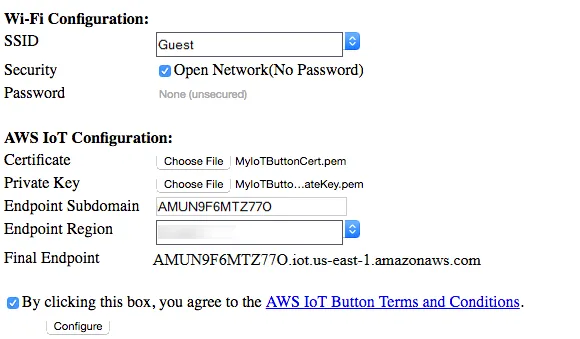
Method 1: Web Interface
Navigate to 192.168.0.1 in your browser and fill out the details.
Method 2: Programmatic Approach (Unreliable)
This method is a lot less reliable but super cool. Make a copy of the config/iot-setup-example.cfg file to config/iot-setup.cfg. Go through and replace:
- wifi_ssid (Line 4) - Your WiFi SSID
- wifi_password (Line 8) - Your WiFi PASS
- aws_iot_certificate (Line 13-32) - Your config/iot-certificate.pem.crt contents
- aws_iot_private_key (Line 38-64) - Your config/iot-private.pem.key contents
- endpoint_region (Line 69) - Your Endpoint Region (e.g. us-east-1)
- endpoint_subdomain (Line 73) - Your Endpoint Subdomain (get from IoT settings)
Finally, make a curl request to the 192.168.0.1/configure endpoint with the payload from the config/iot-setup.cfg file.
curl \
    -X POST \
    -H "Content-Type: multipart/form-data; boundary=---------------------------3227789394019354511493055142" \
    -F file=@config/iot-setup.cfg \
    http://192.168.0.1/configure
Unfortunately the boundary data changes based on the certificate it seems, I’d really like to come up with a robust way of performing the action above to work every-time, If you work it out, comment below, or flick me a message.
What ever method you take, you’ll know it had worked if you see the light flash white, then blink green once. If the light instead blinks red, you will need to confirm you did everything correctly up until now and try again.
AWS IoT Action Rule Deploy
The final step we need to perform is deploying the CloudFormation stack that’s responsible to linking up the AWS IoT Rule that triggers the creation of our brand new VPN stack.
We’ll start by pushing our stack-builder.zip and pptp-server.yaml files to an S3 bucket that CloudFormation can access.
# Package Lambda
cd aws-iot-action && ./package-lambda.sh && ../

# Push Lambda to S3
aws s3 cp aws-iot-action/stack-builder.zip s3://devopstar/resources/aws-iot-vpn-spawner/stack-builder.zip

# Upload copy of PPTP yaml
aws s3 cp aws-pptp-cloudformation/pptp-server.yaml s3://devopstar/resources/aws-iot-vpn-spawner/pptp-server.yaml
Make sure you edit your aws-iot-action/iot-rule-params.json to include your S3 paths if you aren’t using mine. You also need to make sure you update your IoTButtonTopic parameter so that it matches your device ID (found on the back of the button). The VPNSubscriber should be set to your email address that you want to receive notifications to about your newly created VPN.
Now just launch the creation of the stack
aws cloudformation create-stack --stack-name "devopstar-iot-rule" \
    --template-body file://aws-iot-action/iot-rule.yaml \
    --parameters file://aws-iot-action/iot-rule-params.json \
    --capabilities CAPABILITY_IAM
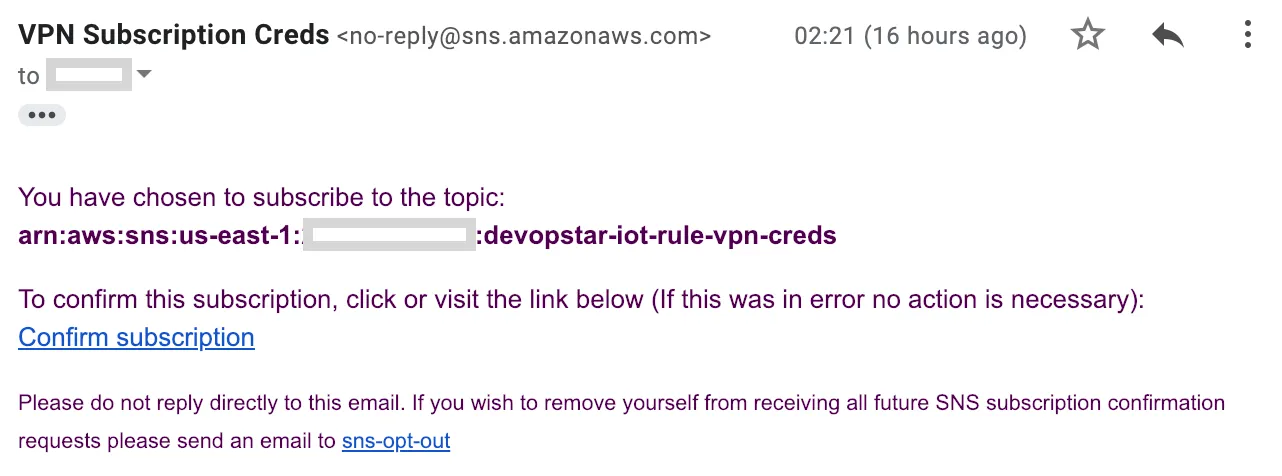
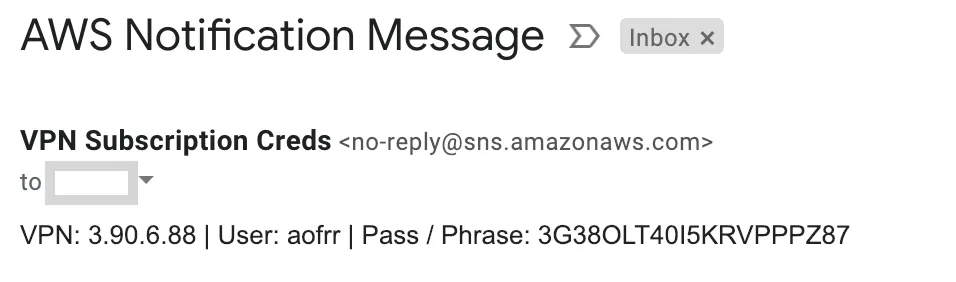
You should receive an email alerting and asking for confirmation about a new Email subscription. Make sure you click confirm.
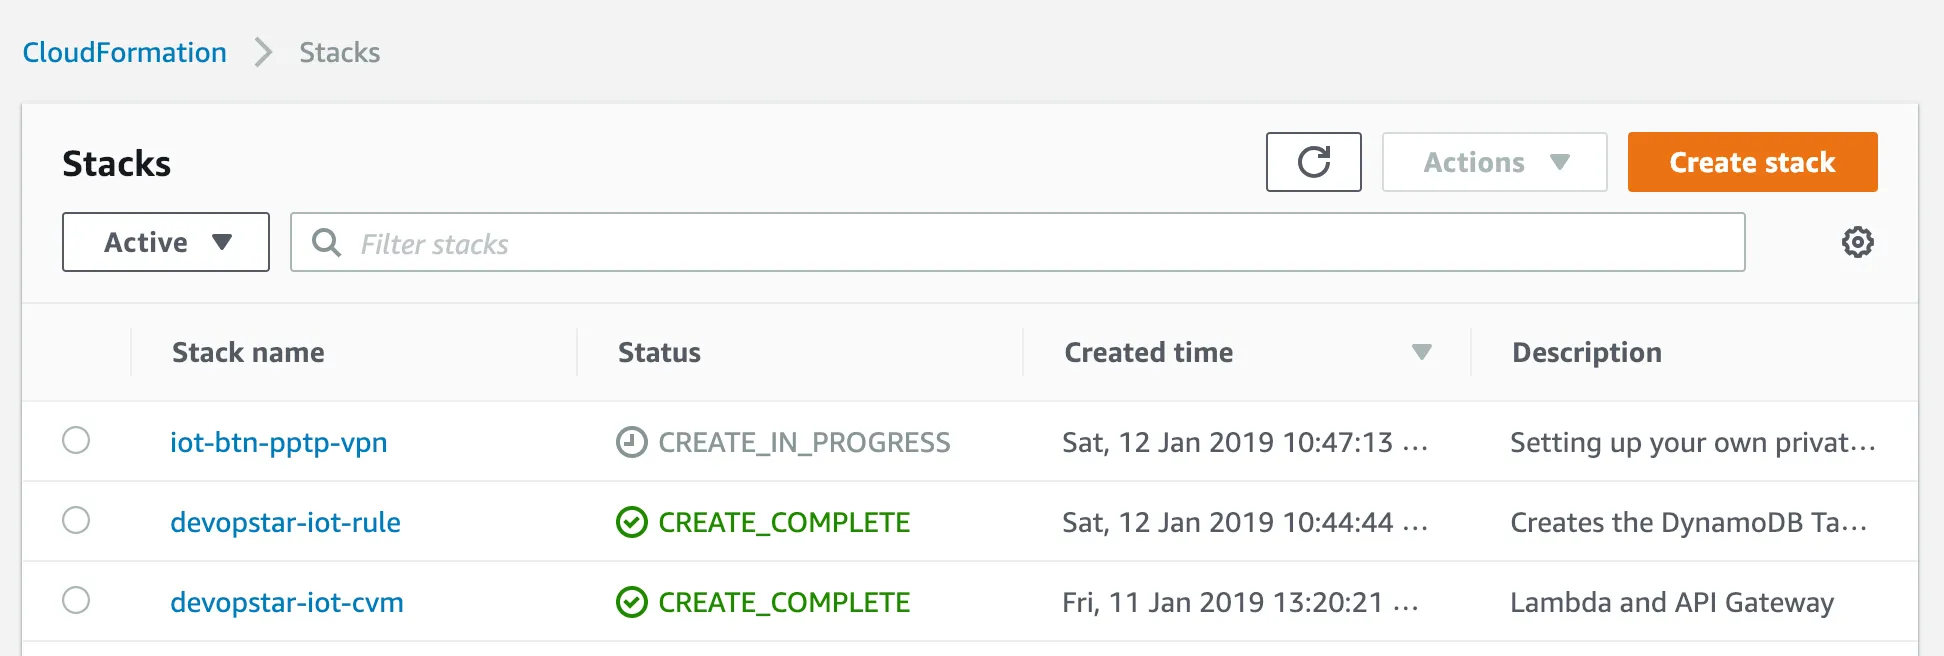
Testing
Let’s test it out! Press the button. You should see a new CloudFormation task start up deploying your new VPN.
Learn More
If you’ve enjoyed this post, and want to learn more about AWS IoT; I encourage you to check out the course I produced on AWS IoT: The Hobbyists Guide to Home Automation