Amplify Flutter - Cat Image App


AWS Amplify Flutter launched its developer preview this week. For those who aren't aware I'm a massive Flutter lover and I've gone as far as to even teach a course on it. Cross-platform mobile development has always been difficult when particular libraries aren't always available across Android and iOS. Flutter has been growing rapidly over the last couple of years in this space and attracted enough attention that AWS has developed Amplify integration with Flutter.
If you aren't aware of what AWS Amplify is, just imagine a set of awesome tools and services all bundled up for ease of use. Incorporating the best and most secure practices from scratch.
In this tutorial, we'll quickly explore how to bootstrap a simple Flutter app with AWS Amplify and build a Cat app for storing images of our fluffy friends.
Requirements
For this guide, there are three main components you will need.
- Flutter
- AWS Account - You will require a user account with credentials set up on your local system.
- Amplify CLI - Flutter version - Use this helpful guide provided on the Amplify docs site. Make sure you are using the Flutter version of the CLI
Note: To check whether you have the Flutter version of the Amplify CLI, run
amplify versionand confirm the version ends with-flutter-preview
# If you don't want to follow the guide above
# (though I HIGHLY recommend it)
npm install -g @aws-amplify/cli@flutter-preview
Be sure that you have configured your Amplify CLI by running the following. You will be prompted with some information about the default AWS region; select the location closest to you.
amplify configureNote: If you already have AWS CLI credentials set up on your system you can skip this step, provided they contain the correct permissions for amplify deployments.
Setup Amplify Project
For this guide, we'll make use of the existing aws-amplify/amplify-flutter app and build on top of it
Let us begin by cloning the project to the local system.
git clone git@github.com:aws-amplify/amplify-flutter.gitSince we're only interested in using the example folder in the repository, go ahead and copy it out somewhere else (feel free to rename it also)
# Move the example folder to something to match your project idea
mv amplify-flutter/example/ amplify-flutter-cat-app
cd amplify-flutter-cat-app
Next, we need to initialize our Flutter app! Run the following from the project folder
amplify init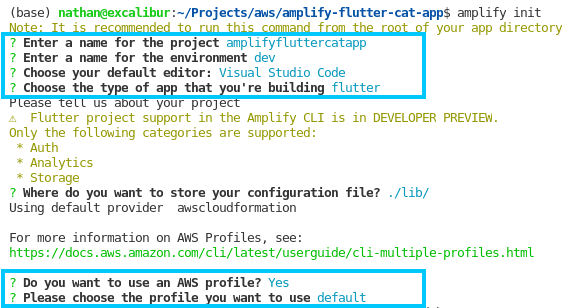
It's fine to select the defaults for most options, however, if you are using a different IDE than Visual Studio Code feel free to change that.
Once the Amplify app is initialized next we need to add the amplify add-ons that our app will be using.
AWS Amplify Auth
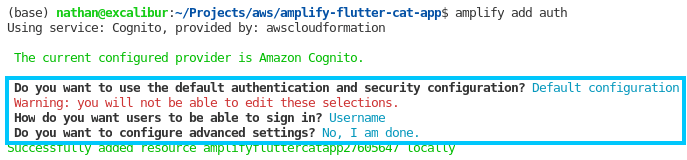
amplify add authAll the settings here can be set to default. Feel free to select whatever method you would like for users to log in with (this just means the username field).
AWS Amplify Storage
amplify add storageSelect Content as the backend Database type. This just means that an S3 bucket will be used to store and serve static assets.
Be sure that you select the access permission of create/update and read when asked as this will allow authenticated users to add and view images in the app.

AWS Amplify Analytics
amplify add analyticsFor analytics make sure that Amazon Pinpoint is selected for this example.

Finally, once all three add-ons have been configured individually push the amplify changes just made by running the following command.
amplify push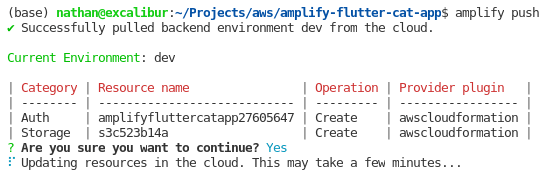
Once the push is completed you should be greeted with the amazing ✅

Build Flutter App
The next step is to build the Flutter app and confirm that the AWS Amplify configuration works correctly. In this section, we will also cover how to pull in Flutter dependencies and deploy them to an Android phone.
To begin with, we must pull in all the Flutter dependencies required to build the project. This can be achieved by running the following command
flutter pub getThis command checks the pubspec.yaml file for dependencies and pulls them down. In this case, you can see that the amplify dev packages are listed
dependencies:
  flutter:
    sdk: flutter
  file_picker: ^1.8.0+1
  amplify_core: ^0.0.1-dev.1
  amplify_analytics_pinpoint: ^0.0.1-dev.1
  amplify_auth_cognito: ^0.0.1-dev.1
  amplify_storage_s3: ^0.0.1-dev.1
The next step requires an Android/iOS device (on macOS) to be plugged into your computer that can be deployed to. Once connected run the following command to build and deploy the Flutter app to your phone
flutter runWhen the app launches you will be greeted with a login screen.
- Click Sign Up and fill our your details
- Retrieve your confirmation code via email and confirm your sign up
- Sign in with your authorized user
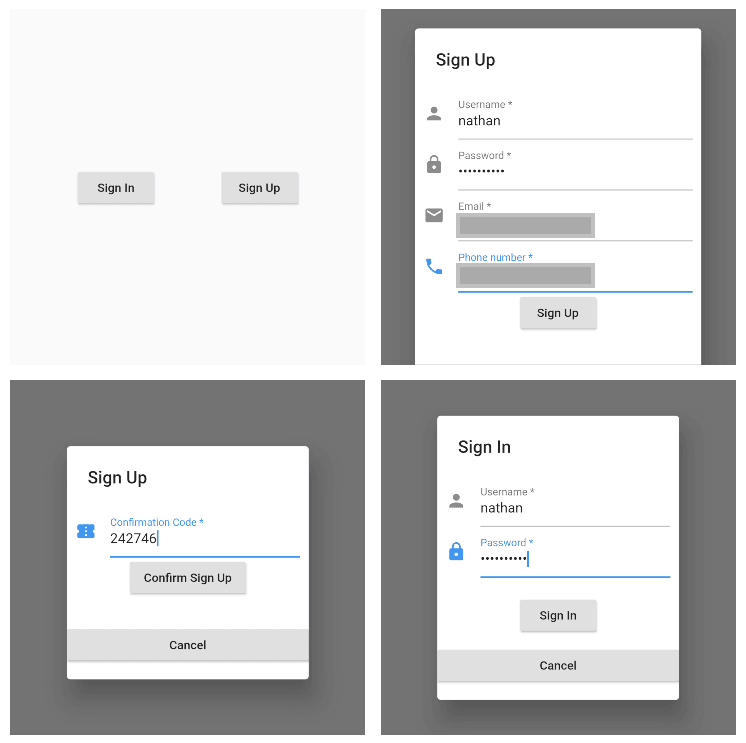
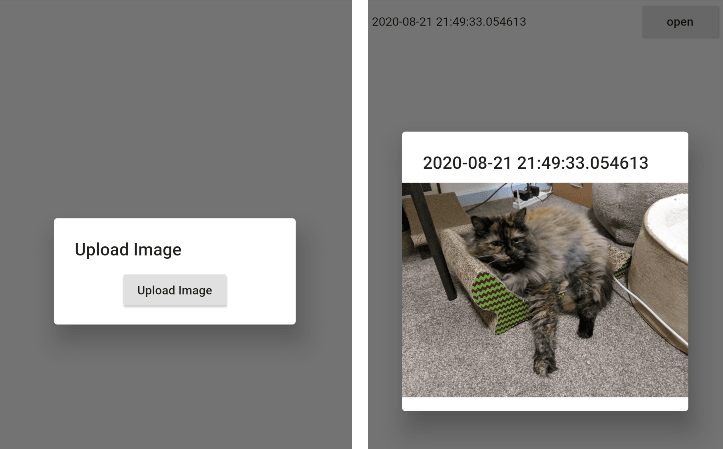
After signing in you can upload images by clicking the blue + in the bottom right of the screen and submitting a photo from your phone gallery
Clean Up
To clean up the project, you can run the following command from the project directory. Note that doing so will delete everything from the project.
amplify deleteSummary
AWS Amplify has always been a favorite of mine when it comes to developing apps fast and securely on AWS so pairing that with my favorite cross-platform framework, Flutter; I was always going to be biased towards the awesomeness.
I'm interested to hear what you think about the brand new support for Flutter in AWS Amplify, hit me up on Twitter @nathangloverAUS if you have any thoughts or questions.