AWS RoboMaker - Raspberry Pi Bootstrap


In the previous post AWS IoT Greengrass CloudFormation – Raspberry Pi we explored what is required to setup AWS Greengrass on a Raspberry Pi. This allowed us to manage a fleet of IoT edge devices using AWS CloudFormation.
With this in place, we can begin to look at what we might be able to do with a Robot Fleet using another AWS service, AWS RoboMaker.
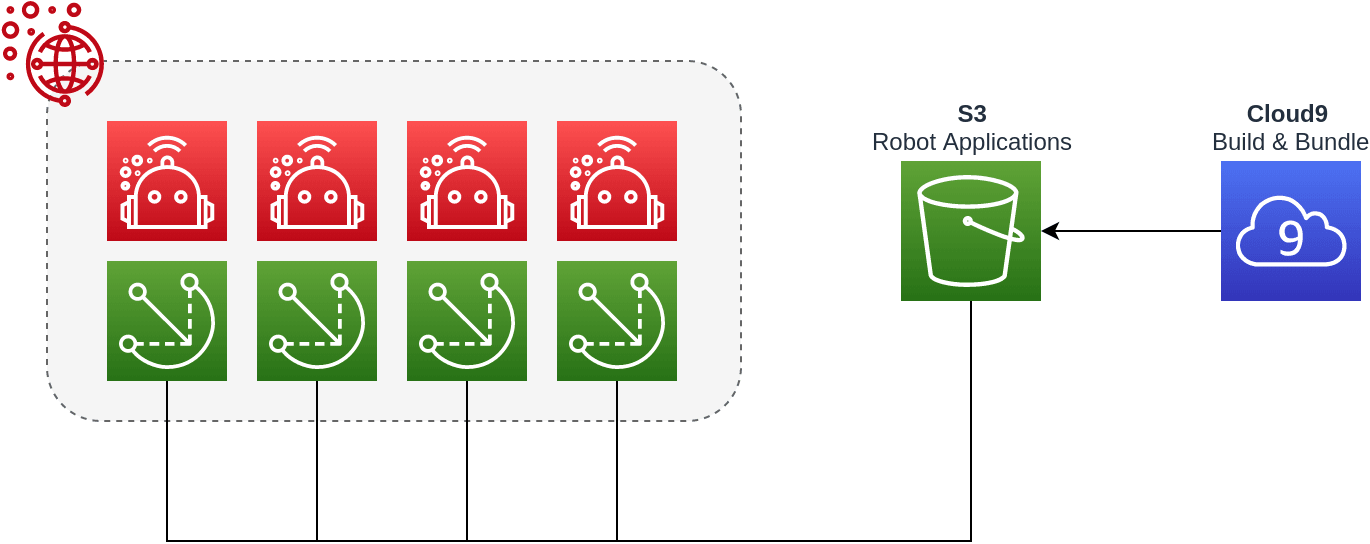
In this guide, we'll be looking at how to build and bundle ROS applications specifically for the Raspberry Pi ARMHF architecture using Cloud9. The final goal is to have the bundled application deployed over AWS RoboMaker.
Prerequisites
- AWS Account with AWS CLI Setup
- Edge Device, in the case of this post I’m using a Raspberry Pi 3B+
- Have a Raspberry Pi setup with Greengrass already based on the previous post
- Clone t04glovern/aws-robomaker-cfn locally
Quick Greengrass Setup
If you haven't already set up a device with Greengrass, I urge you to go do that before completing this post, however, if you want a burst fire round on setting it up, I've included everything needed in this repository too.
NOTE: I've stripped out some of the functionality that isn't required for RoboMaker from the greengrass.yaml we use below. Don't worry too much if you are still running it.
NOTE: I've also added some policy permissions that will need to be added to the existing Greengrass stack. You can simply run update-stack instead of create-stack with the following (presuming your stack is named the same).
aws cloudformation create-stack \
    --stack-name "devopstar-rpi-gg-core" \
    --template-body file://aws/greengrass.yaml \
    --region "us-east-1" \
    --capabilities CAPABILITY_IAM
Copy the certificates and config out and over to your Greengrass device.
cd aws
./greengrass.sh
Using the appropriate Greengrass version from here install and setup Greengrass (referring to the previous guide when needed).
RoboMaker Create
The first step will be to create a brand-new robot through RoboMaker. This process requires four parts:
- RoboMaker Fleet Create
- RoboMaker Robot Create
- RoboMaker Application Create
- RoboMaker Deployment Create
Luckily we're able to use CloudFormation for a good portion of this deployment currently. The only exception is the deployment phase which must be done using AWS CLI commands for now.
Have a look at the script we're about to run called robomaker.sh. Its responsibility it just to pull down the existing Greengrass group ID from the previously created Greengrass stack (called devopstar-rpi-gg-core) in my case.
greengrassGroupId=$(aws cloudformation describe-stacks \
    --stack-name devopstar-rpi-gg-core \
    --query 'Stacks[0].Outputs[?OutputKey==`GreengrassGroupId`].OutputValue' \
    --region ${AWS_REGION} \
    --output text)
Using this Greengrass ID, we're able to set up a RoboMaker Fleet & Robot. by calling a CloudFormation template aws/robomaker.yaml that I prepared earlier.
NOTE: There are a variety of other settings that can be overridden for the robot deployment. This includes the architecture type of the device. In our case it is a Raspberry Pi with arm7hf so ARMHF is selected, however, your device might be something different.
aws cloudformation create-stack \
    --stack-name "devopstar-rpi-robot" \
    --template-body file://robomaker.yaml \
    --parameters \
        ParameterKey=GreengrassGroupId,ParameterValue=${greengrassGroupId} \
    --region ${AWS_REGION}

aws cloudformation wait stack-create-complete \
    --region ${AWS_REGION} \
    --stack-name "devopstar-rpi-robot"
The final step in the script is to retrieve the name of the S3 bucket that is created for our RoboMaker deployments. This is the location where we'll be putting our deployment files and is available to our robots.
robotBucketName=$(aws cloudformation describe-stacks \
    --stack-name devopstar-rpi-robot \
    --query 'Stacks[0].Outputs[?OutputKey==`RobotAppBucket`].OutputValue' \
    --region ${AWS_REGION} \
    --output text)

echo "Put robot deployment files in s3://${robotBucketName}"
To run all of the above steps in one hit, simply punch in the following commands.
cd aws
./robomaker.sh
Then the deployment completes you'll be presented with a bucket that we will use in the next step to store our RoboMaker app.
# Put robot deployment files in s3://BUCKET_NAMECloud9 Environment
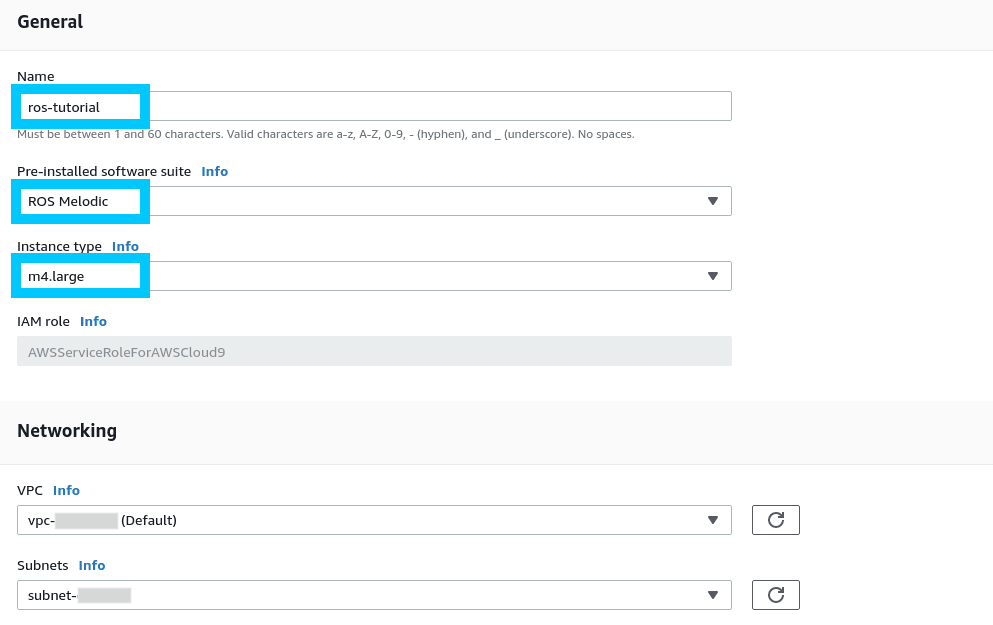
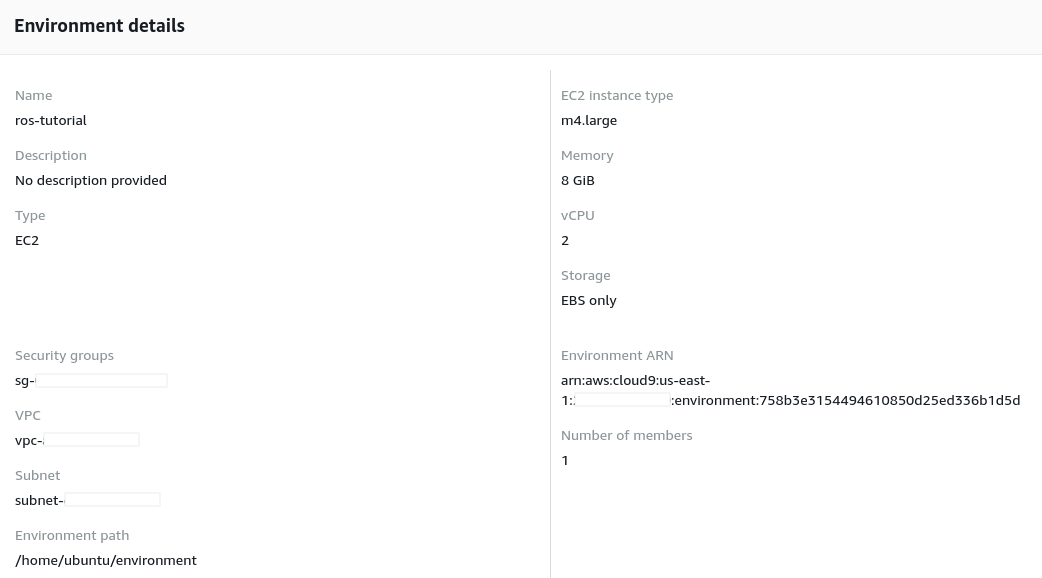
To make life easier when working with ROS we will be making use of ROS Cloud9 Environments. This is effectively a cloud IDE with everything ROS setup for you.
Navigate to the developer IDE section in AWS RoboMaker and create a new instance with the following settings.
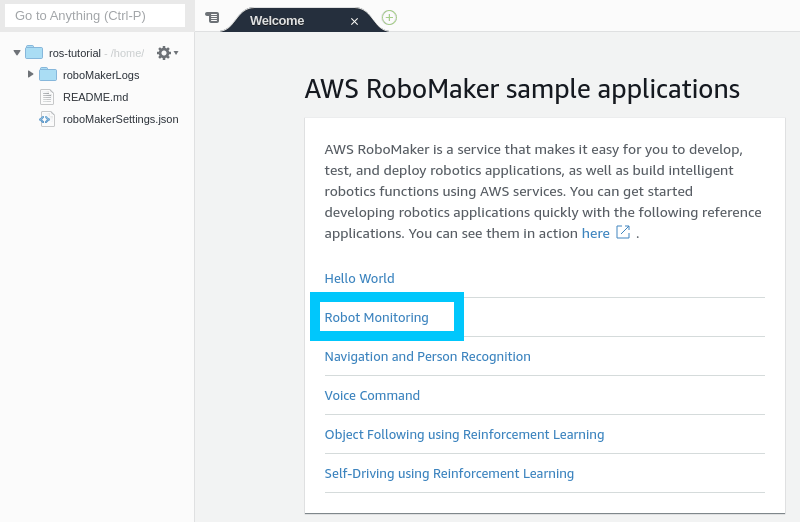
Once the environment starts up we're just going to open an example project by clicking "Robot Monitoring". You will begin to see a download occurring pulling down the sample project, and once complete you will be presented with a README.
sudo apt-get update
rosdep update
Build & Bundle
x86_64
Building and bundling for x86_64 are really easy since we're already on an x86_64 system architecture.
cd ~/environment/CloudWatch/robot_ws
rosws update
rosdep install --from-paths src --ignore-src -r -y
colcon build
We will use colcon to build and bundle our robot application
cd ~/environment/CloudWatch/robot_ws
source install/local_setup.sh
colcon bundle
armhf
Since we're trying to build for the Raspberry Pi we need to make sure we're cross-compiling for armhf. Start off by building the cross-compile docker image (this step will take a while)
cd /opt/robomaker/cross-compilation-dockerfile/
sudo bin/build_image.bash
Connect to the ros-cross-compile container
cd ~/environment/CloudWatch/robot_ws
sudo docker run -v $(pwd):/ws -it ros-cross-compile:armhf
Now you're inside the cross-compilation docker container. Run the following commands to build the workspace
# build the workspace
cd ws
apt update
rosdep install --from-paths src --ignore-src -r -y

# These steps will take a while
colcon build --build-base armhf_build --install-base armhf_install
colcon bundle --build-base armhf_build --install-base armhf_install --bundle-base armhf_bundle --apt-sources-list /opt/cross/apt-sources.yaml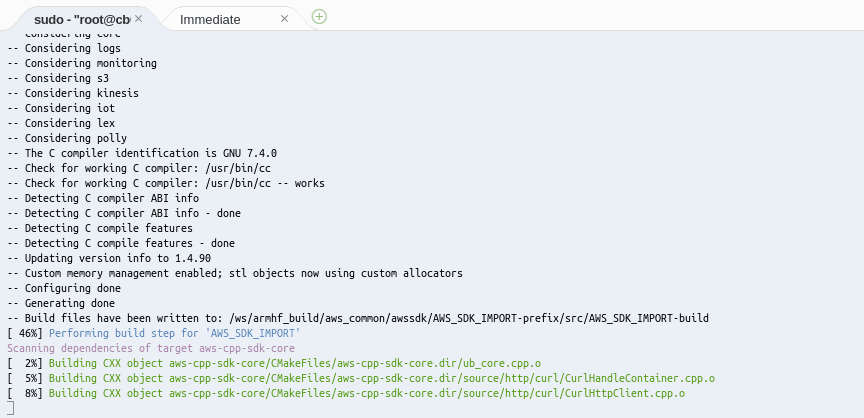
Finally, exit the container after the bundle is successful:
exitCopy Bundle to S3
Copy the bundle to our S3 bucket using the following command:
aws s3 cp armhf_bundle/output.tar s3://BUCKET_NAME/cloudwatch_robot/output.tarThis will place the bundled output.tar in an S3 bucket location that will be used by RoboMaker during application deployments.

NOTE: In production it would be a better idea to store this output file in versioned prefix locations (eg. s3://BUCKET_NAME/cloudwatch_robot/v1/output.tar)
RoboMaker App Deploy
cd aws
./robomaker-app.sh
The status of the deployment can be viewed in the RoboMaker deployment console.
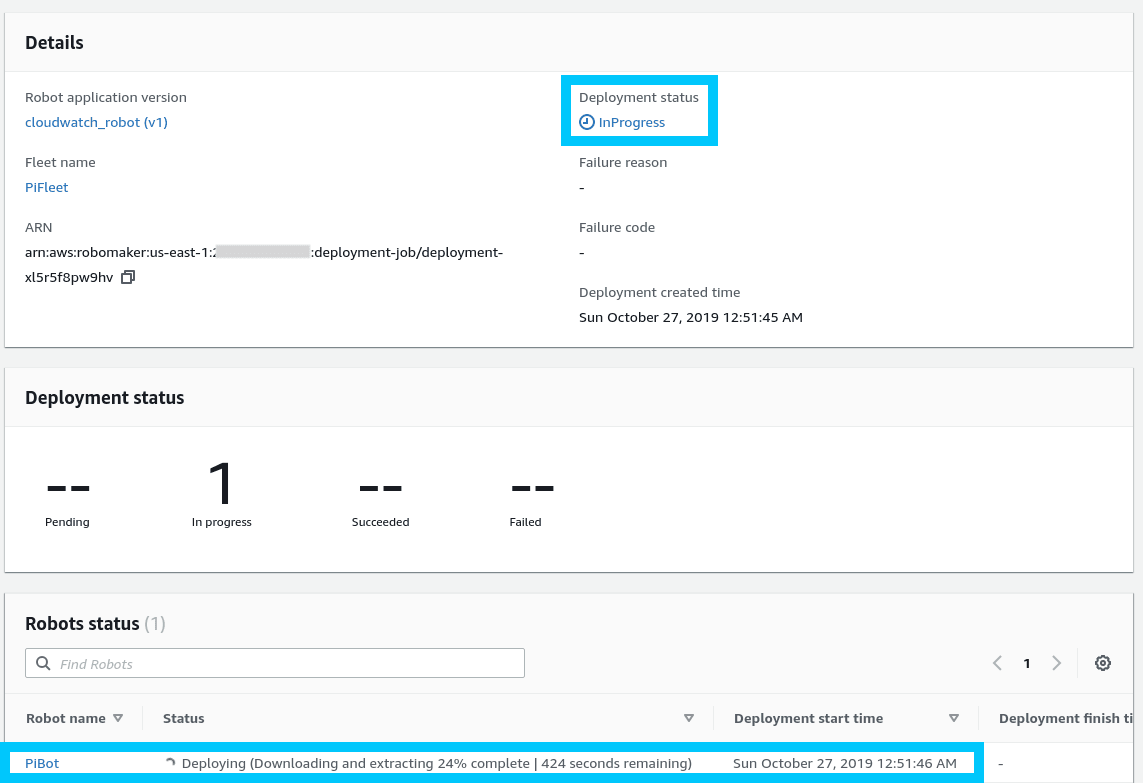
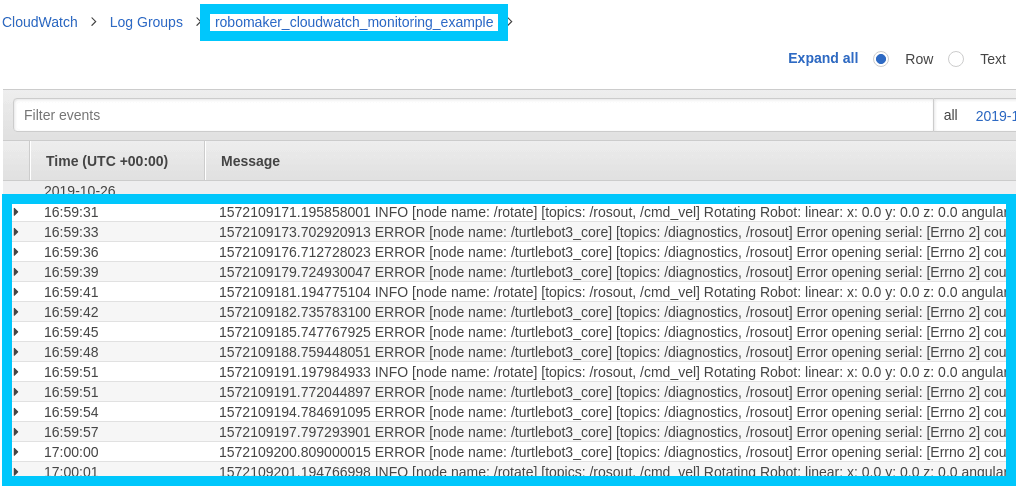
Once the deployment is successful you should start to see CloudWatch logs coming through (in us-west-2 by default).
NOTE: you will likely see mostly errors since you aren't deploying to a TurtleBot3 (the default the CloudWatch demo repo was created for)
Cleanup
Before walking away from the project, make sure to remove the things we set up (especially the Cloud9 Environment).
Cloud9 Cleanup
The Cloud9 environment can be removed from the RoboMaker Environments section of the portal.
CloudFormation Stacks Cleanup
The CloudFormation stacks can either be removed from the CloudFormation console or via CLI commands like the following:
aws cloudformation delete-stack \
    --stack-name "devopstar-rpi-robot-app-cloudwatch"

aws cloudformation delete-stack \
    --stack-name "devopstar-rpi-robot"

aws cloudformation delete-stack \
    --stack-name "devopstar-rpi-gg-core"