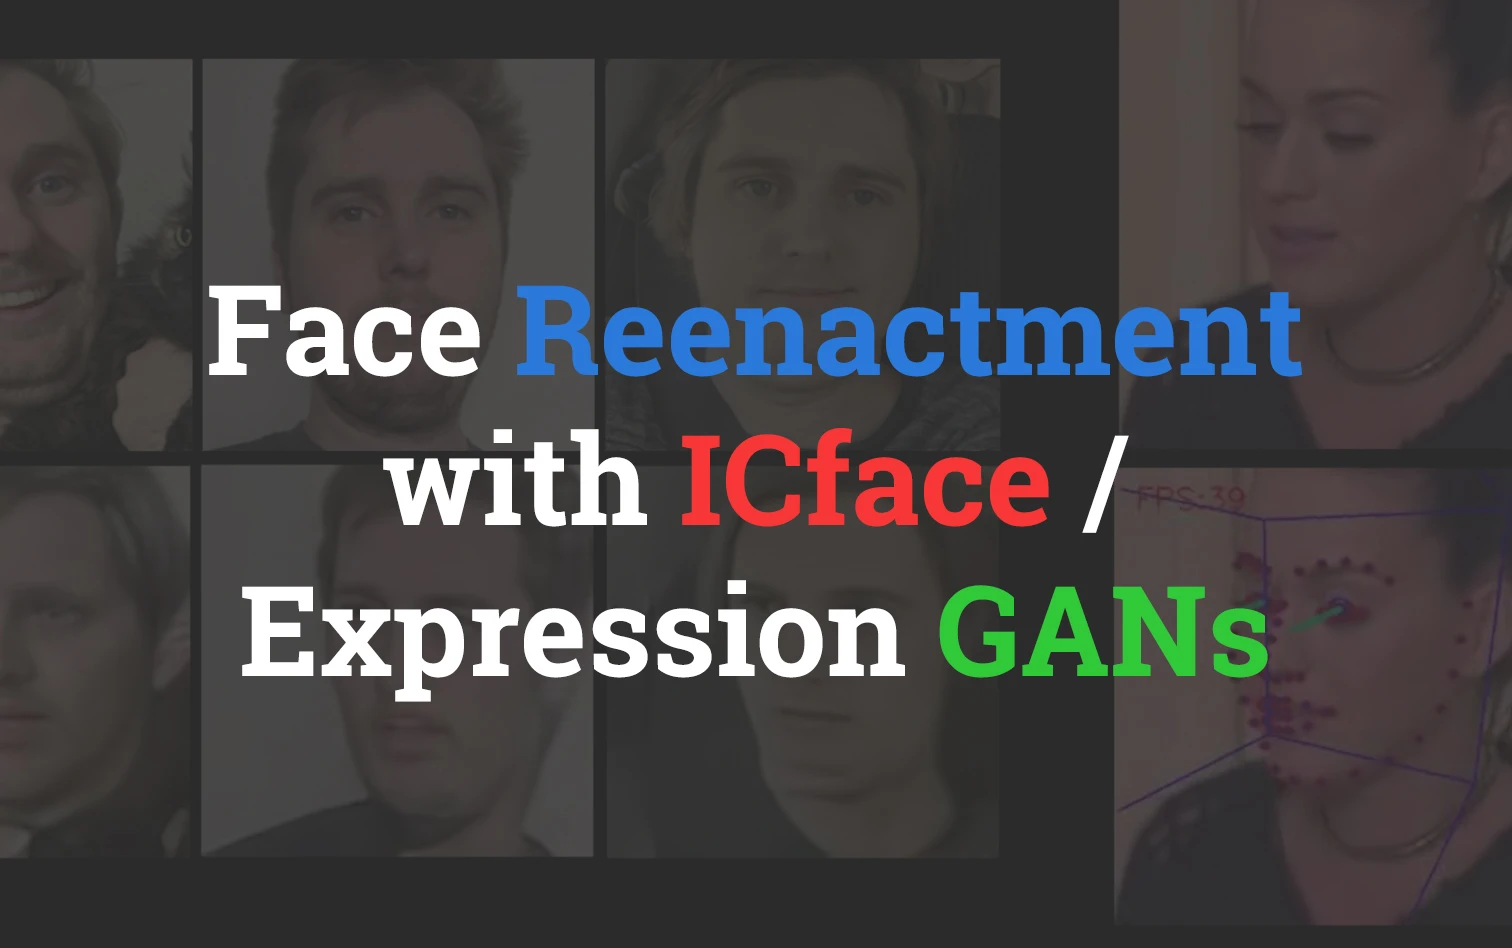
Exploring Interpretable and Controllable Face Reenactment (ICface)
I’ve been trying to learn more about data science & machine learning recently. Part of the learning process for myself is usually deep diving into interesting projects other people have worked on. I find this very quickly immerses me in the higher level concepts and keeps me engaged while I try to figure out the more maths heavy (and for me more difficult) parts of ML.
ICface Introduction
ICface is a generic face animator that is able to control the pose and expressions of a given face image. The animation is driven by human interpretable control signals consisting of head pose angles and the Action Unit (AU) values.
ICface demo
I came across ICface on /r/MachineLearning the other day and was immediately intrigued by the slightly uncanny valley vibes it was generating. Not only that but Soumya Tripathy had also provided some source code on GitHub, along with an Arxiv paper. However when I did try to run the pre-trained model I was finding it difficult to to get the proof of concept up and running, mostly due to a lack of understanding about what was going on under the hood.
The following post outlines the steps that can be taken in order to get ICface up and running with your own input videos.
ICface Repository
I need to stress that the actual implementations of these algorithms are taken from the original repository https://github.com/Blade6570/icface. I had however created a slightly altered version of the code base that can be found on my repository https://github.com/t04glovern/icface. Go ahead and pull down the repository using the following command:
git clone https://github.com/t04glovern/icface.git
There are also three main software dependencies that I recommend you fur-fill before going any further:
- AWS CLI - We’ll be pulling the model files from an S3 bucket I maintain. I will also provide the original links to the model files in the ICface source repo
- Conda - Anaconda is a better way of managing multiple python environments and dependencies. It’s quite important for our use case here as we actually need two python versions.
- Docker - Containerised environments. We’ll be using docker later on to generate action points for video files to save you for installing OpenFace.
ICface Model
Pull down the pre-trained model from one of the two following sources
- ICface Google Drive: https://drive.google.com/drive/folders/1jvD8R-Ggo3Seg2tF-JsqlOjwropVwN1S?usp=sharing
- S3 bucket: s3://devopstar/resources/icface
If you are going down the S3 bucket route, use the script in my repository to pull down the model into the correct spot.
./data_get.sh get
ICface Dependencies
Dependencies for this project turned out to be the more difficult part to deal with. The main reason was that dlib was utilised during the image crop task which is incompatible with Python 3.7. Whilst I thought I’d be able to use an older version of Python, when I did I had problems with PyTorch not playing nicely.
To handle these separate environments I wrote two separate Conda env’s to handle the varying requirements. Create both of these environments in preparation for the following sections.
environment-dlib.yml
conda env create -f environment-dlib.yml
name: icface-dlib
channels:
  - conda-forge

dependencies:
  - python==3.6
  - dlib
  - numpy
  - pandas
  - pip:
    - opencv-python
    - imutils
    - Pillow
environment.yml
conda env create -f environment.yml
name: icface
channels:
  - conda-forge

dependencies:
  - python==3.7
  - dominate
  - numpy
  - pandas
  - pip:
    - natsort
    - opencv-python
    - torch==0.4.1.post2
    - torchvision
    - imutils
    - Pillow
Image Crop & Preparation
The network requires:
- Source image - An image of a person we’d like to generate expressions for
- Driving Image - An image (in the case of the project, a video) with expressions that will be mimicked.
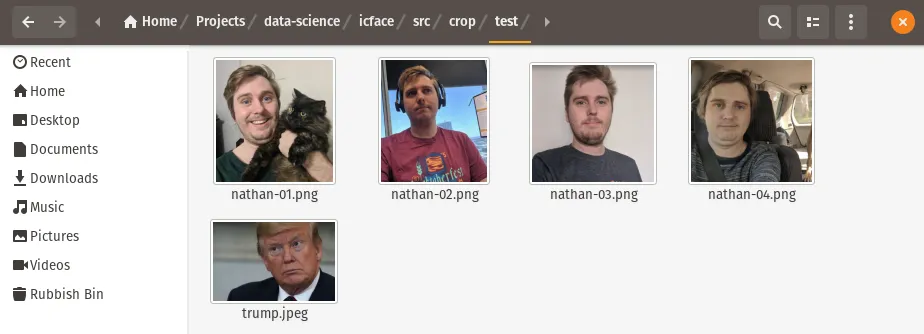
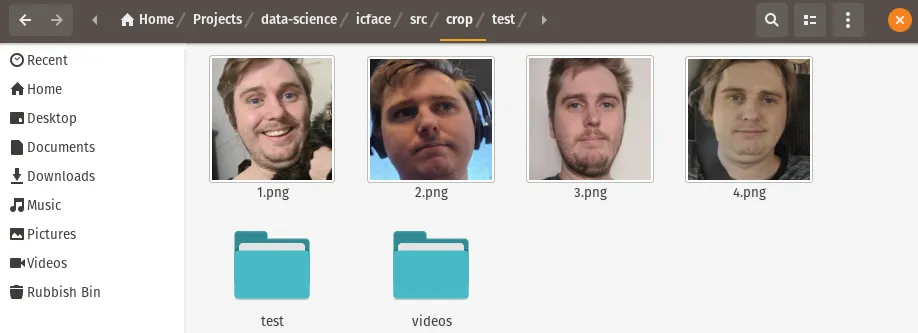
Grab one or a number of images you’d like to use. I’m going to be using pictures of myself. Place them into the src/crop/test folder with in the project. You can see I’m using four however that’s only because I want to show the differences.
Next we’ll use our icface-dlib python environment to generate some cropped versions of these images.
# Activate dlib conda
cd src/
conda activate icface-dlib

# Generate ./crop/1.png
python image_crop.py \
  --image ./crop/test/nathan-01.png \
  --id 1
Repeat the generate command (increment the id value for however many images you have. As you can see I have four images (1-4.png) in the src/crop folder now.
Driving Video
The driving video part of this tutorial is where I got stuck, as I wanted to make use of other videos in the voxceleb dataset but the original README was a little unclear about how to generate the action units.
Have a look at the repository that I provided under src/crop/videos/ and take note of the sample video files and accompanying action unit CSV’s. These CV files are the data point representation of the image seen below, for each frame of a video.
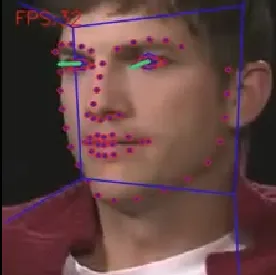
OpenFace processed frame
You have the option to either use one of the three examples found in the repository or work through the following step in order to generate action units for a different video within the voxceleb dataset.
Generating Action Units
We’re going to generate the action units for src/crop/videos/00225.mp4. We’ll do this with a nice docker container that Edgar Aroutiounian created.
docker run -it --rm algebr/openface:latest
# root@dac043315e54:/home/openface-build#
This will place you inside the container, node that the dac043315e54 in my case will be different to you, however that hostname is important for the next step.
Open up a new terminal window and from within the repository run the following command to copy in the sample video. Note you replace the docker-container and video-id values with your container hostname and video file name.
# Outside Container (new terminal window)
docker cp src/crop/videos/${video-id}.mp4 ${docker-container}:/home/openface-build
# docker cp src/crop/videos/00225.mp4 dac043315e54:/home/openface-build
Then back within the docker container run the following, again making sure to replace the file name
# Within container (/home/openface-build)
./build/bin/FeatureExtraction -f ${video-id}.mp4
# ./build/bin/FeatureExtraction -f 00225.mp4
Back outside of the container, run the following command to copy out the processed action unit file
# Outside Container
docker cp ${docker-container}:/home/openface-build/processed/${video-id}.csv src/crop/videos
# docker cp dac043315e54:/home/openface-build/processed/00225.csv src/crop/videos
Generate Video
We can finally generate a video! First activate the icface conda instance and then run the following command (assuming you are using the 00225 CSV). Make sure to do this from within the _src/_ folder.
# Activate icface conda
conda activate icface

# Generate a sample video
python test.py \
  --dataroot ./ \
  --model pix2pix \
  --which_model_netG resnet_6blocks \
  --which_direction AtoB \
  --dataset_mode aligned \
  --norm batch \
  --display_id 0 \
  --batchSize 1 \
  --loadSize 128 \
  --fineSize 128 \
  --no_flip \
  --name gpubatch_resnet \
  --how_many 1 \
  --ndf 256 \
  --ngf 128 \
  --which_ref ./crop/1.png \
  --gpu_ids 0 \
  --csv_path ./crop/videos/00225.csv \
  --results_dir results_video
Note: the _--which_ref_ and _--csv_path_ parameters are what control the input files.
Splice Audio
You will only have an output containing video, if you’d like to splice in the audio as well, run the following ffmpeg command (replace 00225 with whatever your input video file was)
ffmpeg -i ./crop/out.mp4 -i ./crop/videos/00225.mp4 -c copy -map 0:0 -map 1:1 -shortest ./crop/out_audio.mp4
Repeat the steps above for each of the videos you want generated.
Scripted Generate
I’ve also written a simple way to run each step given an input image (un-cropped) and a action unit file. You can run blender.sh from the root directory in the repo. Make sure to change the parameters before you do however!
#!/bin/sh

IMAGE_ID=1

# voxceleb video id (in crop/videos/*)
# Options:
# 00116
# 00296
# 00329
VIDEO_ID=00329

# Clean up
rm -rf src/crop/out.mp4
rm -rf src/crop/out_audio.mp4

# Change to source dir
cd src/

# Generate ./crop/1.png
~/anaconda3/envs/icface-dlib/bin/python image_crop.py \
    --image ./crop/test/trump.jpeg \
    --id $IMAGE_ID

# Generate a sample video
~/anaconda3/envs/icface/bin/python test.py \
    --dataroot ./ \
    --model pix2pix \
    --which_model_netG resnet_6blocks \
    --which_direction AtoB \
    --dataset_mode aligned \
    --norm batch \
    --display_id 0 \
    --batchSize 1 \
    --loadSize 128 \
    --fineSize 128 \
    --no_flip \
    --name gpubatch_resnet \
    --how_many 1 \
    --ndf 256 \
    --ngf 128 \
    --which_ref ./crop/$IMAGE_ID.png \
    --gpu_ids 0 \
    --csv_path ./crop/videos/$VIDEO_ID.csv \
    --results_dir results_video

# Splice the audio
ffmpeg \
    -i ./crop/out.mp4 \
    -i ./crop/videos/$VIDEO_ID.mp4 \
    -c copy -map 0:0 -map 1:1 -shortest \
    ./crop/out_audio.mp4