Containerizing & Deploying to Kubernetes on GCP


I've recently begun learning Google Cloud as an alternative to AWS for my cloud hosting. Kubernetes is so hot right now, and I figured it would be good to do a deployment of one of my existing application stacks onto GCP running GKE (Google Kubernetes Engine).

Outcome
We'll be deploying a containerized version of Animal Shelter Manager to our Kubernetes cluster. ASM3 is an open source, relational database backed, management system for animals in shelters. We've started using it for WA Animals and are looking at more reliable (and cheaper) ways to run the stack.
Structure
The Structure of this post is as follows:
- GCP Setup - Setting up a Google cloud project and installing all the CLI tools we will need to spin up resources from the command line.
- GCP Kubernetes Setup - Creating a Google Kubernetes cluster using the CLI and running through some of the commands that can be performed to get information.
- Build Docker Image - Building our applications docker container locally and confirming it works
- GCR Setup - Creating a GCR (Google Cloud Repository) repository and pushing our local image to it.
- Pod Deployment - Defining and Deploying our containers in pods to Kubernetes
All the code and instructions are also outlined in the Git repo that accompanies this post. It can be found at https://github.com/t04glovern/gcp-asm3-demo. I recommend pulling it down locally so you are able to follow along more fluidly.
git clone https://github.com/t04glovern/gcp-asm3-demo.git
cd gcp-asm3-demo
git submodule update --init --recursive
GCP Setup
Before getting started it's important that you have a Google Cloud account created. Also ensure that a billing method has been added (feel free to use the free trial you get when signing up for this tutorial).
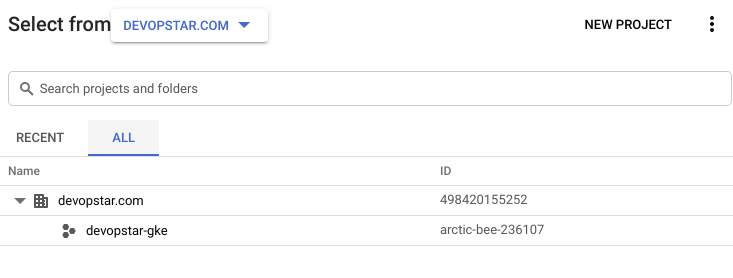
Create a new project that can be used for the remainder of this tutorial. Don't worry about an Organisation, however ensure that when you've created your project you note down the ID. In my case I got arctic-bee-236107.
SDK / CLI
I'm going to be installing the GCP SDK on a Debian based system, however there are instructions specific to all other operating systems available at https://cloud.google.com/sdk/install.
# Create an environment variable for the correct distribution
export CLOUD_SDK_REPO="cloud-sdk-$(lsb_release -c -s)"

# Add the Cloud SDK distribution URI as a package source
echo "deb http://packages.cloud.google.com/apt $CLOUD_SDK_REPO main" | sudo tee -a /etc/apt/sources.list.d/google-cloud-sdk.list

# Import the Google Cloud public key
curl https://packages.cloud.google.com/apt/doc/apt-key.gpg | sudo apt-key add -

# Update and install the Cloud SDK
sudo apt-get update && sudo apt-get install google-cloud-sdk
You will also need kubectl for Kubernetes cluster management, you can install this using the following. There are more details about other OS installations at https://kubernetes.io/docs/tasks/tools/install-kubectl/.
sudo apt-get install kubectlInit CLI
Next initialise the CLI by running the following. Note you might be prompted for a project ID, select the ID that is linked to the devopstar-gke project in your organisation.
$ gcloud init
# * Commands that require authentication will use contact@devopstar.com by default
# * Commands will reference project `XXXXXX-XXX-XXXXXXX` by default
# * Compute Engine commands will use region `australia-southeast1` by default
# * Compute Engine commands will use zone `australia-southeast1-a` by default
The alternative way to configure a project / authenticate is to run the following:
# Login to GCloud
gcloud auth login

# Set the project
gcloud config set project PROJECT_ID
If you want to check the configurations you can find the files in ~/.config/gcloud
ls ~/.config/gcloud
# access_tokens.db  config_sentinel  credentials.db  legacy_credentials
# active_config     configurations   gce             logs
GCP Kubernetes Setup
In this section we'll go through the process of creating a new Kubernetes cluster on GCP using the CLI tools that were just installed.
Create Cluster
We'll start by firing up a new GKE cluster by running the following. More information about parameters for the clusters create command can be found here.
gcloud container clusters create devopstar-gke-clst-1 \
    --num-nodes 2 \
    --cluster-version 1.12.6-gke.7 \
    --machine-type g1-small \
--region australia-southeast1NOTE: I've specified a cluster-version as part of the creation. If you would like to get a list of versions available simply run gcloud container get-server-config.
Connect to Existing
If you already have a Kubernetes cluster created on GKE you can grab the connection command from the GKE console. It should look like something similar to below (replace the project name obviously).
gcloud container clusters get-credentials devopstar-gke-clst-1 \
    --region australia-southeast1 \
    --project arctic-bee-236107
Get Cluster Information
In order to test everything is up and running, you can run some of the following commands to view various details about the deployed resources
$ kubectl cluster-info
# Kubernetes master is running at https://XXX.XXX.XXX.XXX
# GLBCDefaultBackend is running at https://XXX.XXX.XXX.XXX/api/v1/namespaces/kube-system/services/default-http-backend:http/proxy
# Heapster is running at https://XXX.XXX.XXX.XXX/api/v1/namespaces/kube-system/services/heapster/proxy
# KubeDNS is running at https://XXX.XXX.XXX.XXX/api/v1/namespaces/kube-system/services/kube-dns:dns/proxy
# Metrics-server is running at https://XXX.XXX.XXX.XXX/api/v1/namespaces/kube-system/services/https:metrics-server:/proxy

$ kubectl get nodes
# NAME                                                  STATUS   ROLES    AGE   VERSION
# gke-devopstar-gke-clst-1-default-pool-2e1439f4-hr9s   Ready       58s   v1.12.6-gke.7
# gke-devopstar-gke-clst-1-default-pool-2e1439f4-pnqj   Ready       1m    v1.12.6-gke.7
# gke-devopstar-gke-clst-1-default-pool-5a44aa0a-cdml   Ready       56s   v1.12.6-gke.7
# gke-devopstar-gke-clst-1-default-pool-5a44aa0a-lcb8   Ready       53s   v1.12.6-gke.7
# gke-devopstar-gke-clst-1-default-pool-5b4726d0-ndwj   Ready       1m    v1.12.6-gke.7
# gke-devopstar-gke-clst-1-default-pool-5b4726d0-nw85   Ready       1m    v1.12.6-gke.7

$ kubectl config view
# apiVersion: v1
# clusters:
# - cluster:
#     certificate-authority-data: DATA+OMITTED
#     server: https://XXX.XXX.XXX.XXX
#   name: gke_arctic-bee-236107_australia-southeast1_devopstar-gke-clst-1
# contexts:
# - context:
#     cluster: gke_arctic-bee-236107_australia-southeast1_devopstar-gke-clst-1
#     user: gke_arctic-bee-236107_australia-southeast1_devopstar-gke-clst-1
#   name: gke_arctic-bee-236107_australia-southeast1_devopstar-gke-clst-1
# current-context: gke_arctic-bee-236107_australia-southeast1_devopstar-gke-clst-1
# kind: Config
# preferences: {}
# users:
# - name: gke_arctic-bee-236107_australia-southeast1_devopstar-gke-clst-1
#   user:
#     auth-provider:
#       config:
#         access-token: XXXX.XXXXXXXXXXXXXXXXXXXXXXXXXXXXXXXXXXXXXXXXXXXXXXXXXXXXXXXXXXXXXXXXXXXXXXXXXXXX-XXXXXXXXXXXXXXXXXXXXXXXXXXXXXXXXX
#         cmd-args: config config-helper --format=json
#         cmd-path: /usr/lib/google-cloud-sdk/bin/gcloud
#         expiry: "2019-03-30T09:05:45Z"
#         expiry-key: '{.credential.token_expiry}'
#         token-key: '{.credential.access_token}'
#       name: gcp
Docker Containers
I helped by building a Docker pipeline for Animal Shelter Manager that's been merged into master branch at https://github.com/bobintetley/asm3. For the purpose of this tutorial I've also cloned in the repo as a sub module for this project. You can view the code in the asm3 directory.
Building Locally
To start with we'll need to ensure we can build the containers locally, and test functionality before pushing it to Google cloud for deployment. We make use of a docker-compose.yml file in the root directory of the project to orchestrate the building and running of two containers.
version: '3.1'

services:

  postgres:
    environment:
    - POSTGRES_PASSWORD=postgres
    image: postgres
    restart: always
    ports:
    - 5432:5432
    volumes:
    - ./lib/postgres-init.sh:/docker-entrypoint-initdb.d/init-user-db.sh

  asm3:
    build: ./asm3
    image: asm3
    ports:
      - 5000:5000
    volumes:
      - ./lib/asm3.conf.local:/etc/asm3.conf
There are two supporting files for the docker-compose.yml which are listed below:
- postgres-init.sh - Created a user, password and database separate to the one that comes on the postgres docker image by default. While this isn't strictly required (as we can define these values as environment variables) I wanted to demonstrate having a script executed for you on launch
- asm3.conf.local - asm3 configuration, which is loaded into
etc/asm3.confon launch of the container.
Docker Stack Up
Go ahead and bring the local stack up by running the following command. NOTE: this is reliant on you having docker and docker-compose installed on your system
docker-compose up -dThe first time building will take quite a while, as it will need to build the application from source. Go get a cup of coffee! Once it's finished launching however you should be able to view the web interface of the local application on http://localhost:5000.
Non compose build
If you are interested in how to build a container without the compose file, you simply run the following command where -t asm3 refers to the name that you are taking the container under.
docker build -t asm3 ./asm3When building the container, Docker uses the definition / build steps in the Dockerfile in asm3 to create a new container.
Docker Stack Down
Bring down the locally hosted stack by running the following command
docker-compose down -vGCR Setup
Currently the container we have build is sitting on our local system, which isn't much help in terms of making it available to Kubernetes when it comes time to run it. We need to push our build container to a container repository, specifically Google Container Repository.
NOTE: Most of the steps are covered in the tutorial on https://cloud.google.com/container-registry/docs/quickstart. If you get lost refer to it.
Docker Authentication
Before we can push, we have to give Docker permission to push to our Google cloud account. To do this we run the following command authenticating the docker daemon on a couple google hosted repository domains
$ gcloud auth configure-docker
# The following settings will be added to your Docker config file
# located at [/home/user/.docker/config.json]:
#  {
#   "credHelpers": {
#     "gcr.io": "gcloud",
#     "us.gcr.io": "gcloud",
#     "eu.gcr.io": "gcloud",
#     "asia.gcr.io": "gcloud",
#     "staging-k8s.gcr.io": "gcloud",
#     "marketplace.gcr.io": "gcloud"
#   }
# }
Create Container Registery
Navigate to https://console.cloud.google.com/gcr/images and ensure that the Container Registry API is enabled. We have to tag out asm3 image with the correct format for the Google repository. Following the guide here is the best way to ensure its setup correctly for your region.
The overall command we want is the following
docker tag [SOURCE_IMAGE]:[TAG] [HOSTNAME]/[PROJECT-ID]/[IMAGE]:[TAG]- [SOURCE_IMAGE] - asm3
- [HOSTNAME] - asia.gcr.io
- gcr.io hosts the images in the United States, but the location may change in the future
- us.gcr.io hosts the image in the United States, in a separate storage bucket from images hosted by gcr.io
- eu.gcr.io hosts the images in the European Union
- asia.gcr.io hosts the images in Asia
- [PROJECT-ID] - arctic-bee-236107
- [IMAGE] - asm3
This gives me the command following (note the latest tag is optional)
docker tag asm3:latest asia.gcr.io/arctic-bee-236107/asm3:latestFinally, push the image using a similarly structured command
# Command template
docker push [HOSTNAME]/[PROJECT-ID]/[IMAGE]:[TAG]

# Command
docker push asia.gcr.io/arctic-bee-236107/asm3:latest
# The push refers to repository [asia.gcr.io/arctic-bee-236107/asm3]
# 6eb3df4776eb: Pushed
# 99af8167f622: Pushing [===========>                                       ]  295.3MB/1.337GB
# 5512c16ac97f: Pushed
# dc86aa2c4e21: Pushed
# b57c79f4a9f3: Layer already exists
# d60e01b37e74: Layer already exists
# e45cfbc98a50: Layer already exists
# 762d8e1a6054: Layer already exists
Pod Deployment
We're finally at the stage where we can deploy to our Kubernetes cluster. This is done by applying definition files (in the specs folder of the project) to the cluster.
postgres.yml
This template defines the PostgresDB deployment. It uses:
- ConfigMap - defines the environment variable values for the database credentials / db name
- PersistentVolumeClaim - Allocates storage for the DB to sit on top of
- Deployment - Container definition for the postgres instance. Takes in values from the ConfigMap and PersistentVolumeClaim
- Service - Internal cluster IP for our other container to hit this database on.
apiVersion: v1
kind: ConfigMap
metadata:
  name: postgres-config
  namespace: default
data:
  postgres_user: asm3
  postgres_password: asm3
  postgres_database: asm
---
apiVersion: v1
kind: PersistentVolumeClaim
metadata:
  name: postgres-pv-claim
spec:
  accessModes:
    - ReadWriteOnce
  resources:
    requests:
      storage: 8Gi
---
apiVersion: extensions/v1beta1
kind: Deployment
metadata:
  name: postgres
spec:
  template:
    metadata:
      labels:
        app: postgres
    spec:
      volumes:
        - name: postgres-storage
          persistentVolumeClaim:
            claimName: postgres-pv-claim
      containers:
        - image: postgres
          name: postgres
          env:
            - name: POSTGRES_USER
              valueFrom:
                configMapKeyRef:
                  name: postgres-config
                  key: postgres_user
            - name: POSTGRES_PASSWORD
              valueFrom:
                configMapKeyRef:
                  name: postgres-config
                  key: postgres_password
            - name: POSTGRES_DB
              valueFrom:
                configMapKeyRef:
                  name: postgres-config
                  key: postgres_database
            - name: PGDATA
              value: /var/lib/postgresql/data/pgdata
          ports:
            - containerPort: 5432
              name: postgres
          volumeMounts:
            - name: postgres-storage
              mountPath: /var/lib/postgresql/data
---
apiVersion: v1
kind: Service
metadata:
  name: postgres
spec:
  type: ClusterIP
  ports:
    - port: 5432
  selector:
    app: postgres
Deploy the template by running the following command
kubectl apply -f ./specs/postgres.ymlasm3.yml
This template defines the deployment of the asm3 application container. It has the following specifications:
- ConfigMap - This time we use the ConfigMap to store our asm3.conf file that is eventually placed into etc/asm3.conf on the container.
- Deployment - The container deployment configuration. Takes in a volume mount from the ConfigMap and uses it to load the custom configuration to
etc/asm3.conf. - Service - Public load-balancer for the asm3 application. This specification will resolve us a public IP address to access to the service on.
Also note that the container image is set to the repository we created in the previous steps for GCR. In my case it is set to image: asia.gcr.io/arctic-bee-236107/asm3:latest. You will need to update it for your deployment.
Another interesting thing to note is the postgres database information in the configuration is set to postgres.default.svc.cluster.local. This is the DNS name that will be resolvable for pods in the same namespace. In this case the namespace is default and the service is postgres.
apiVersion: v1
kind: ConfigMap
metadata:
  name: asm3-config
  namespace: default
data:
  asm3.conf: |+
    # ASM3 example configuration file

    # The base URL to the ASM installation as seen by the client (should not end with /)
    base_url = http://localhost

    # The URL to asm's service endpoint to be shown in online forms screen
    # (typically base_url + /service)
    service_url = http://localhost/service

    ...
---
apiVersion: extensions/v1beta1
kind: Deployment
metadata:
  name: asm3
  namespace: default
spec:
  replicas: 1
  template:
    metadata:
      name: asm3
      labels:
        app: asm3
    spec:
      containers:
      - name: asm3
        image: asia.gcr.io/arctic-bee-236107/asm3:latest
        volumeMounts:
        - name: asm3-config-volume
          mountPath: /etc/asm3.conf
          subPath: asm3.conf
        ports:
        - containerPort: 5000
          name: asm3
      volumes:
      - name: asm3-config-volume
        configMap:
          name: asm3-config
---
kind: Service
apiVersion: v1
metadata:
  name: asm3-lb
spec:
  selector:
    app: asm3
  type: LoadBalancer
  ports:
  - name: http
    port: 80
    targetPort: 5000
The deployment of this template is slightly more involved due to the way that the application was written. We start out like normal deploying the template
kubectl apply -f ./specs/asm3.ymlThen, once the load-balancer has come up, run the following to retrieve the public IP
kubectl get svc asm3-lb -o jsonpath="{.status.loadBalancer.ingress[0].ip}"Then update the specs/asm3.yml ConfigMap file on line 11 and 15 to use the IP instead of localhost
...

# The base URL to the ASM installation as seen by the client (should not end with /)
base_url = http://

# The URL to asm's service endpoint to be shown in online forms screen
# (typically base_url + /service)
service_url = http:///service

...
Re-run the deployment command to update the ConfigMap
kubectl apply -f ./specs/asm3.ymlNow we need to force restart the pod, and since the pod is part of a ReplicaSet we can just delete the existing on and a new one will be created in its place.
$ kubectl get pods
# NAME                        READY   STATUS    RESTARTS   AGE
# asm3-66c67fbf77-qxlp4       1/1     Running   0          4m42s
# postgres-78ffddbdc5-xjggf   1/1     Running   0          5m3s
Use the pods name in the following command to delete it
$ kubectl delete pod asm3-66c67fbf77-qxlp4
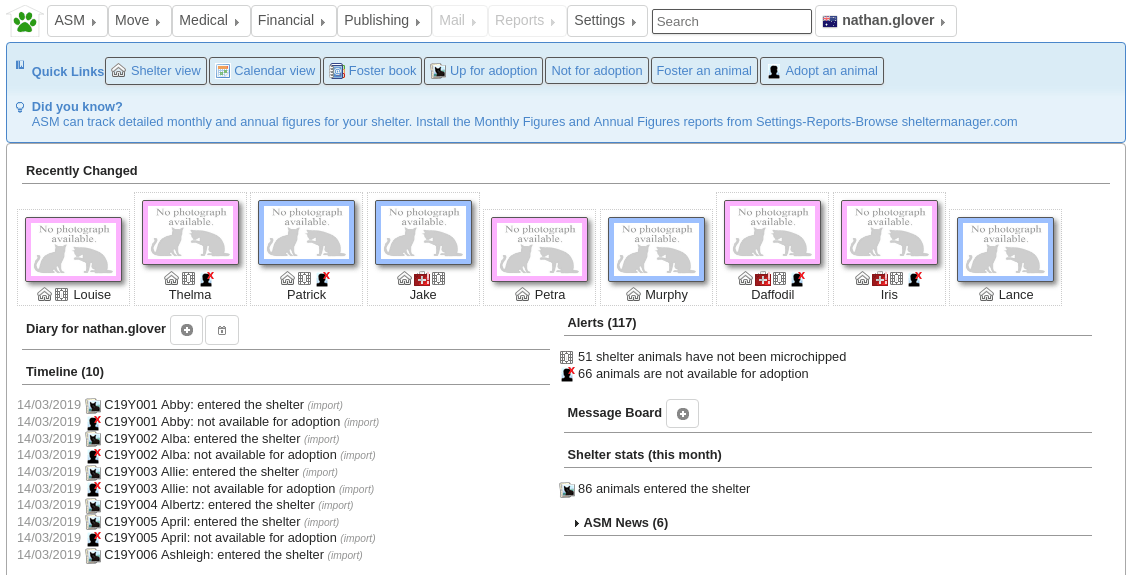
# pod "asm3-66c67fbf77-qxlp4" deletedWe can now navigate to the public load-balancer IP of the deployment and confirm the application is working properly
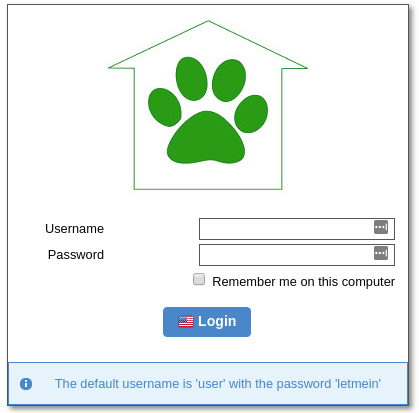
Once the database has initialise you will be able to login with the default credentials user / letmein
Clean Up
Once you're done playing around, you can delete all the resources using the following commands
# Delete deployments
kubectl delete -f ./specs/asm3.yml
kubectl delete -f ./specs/postgres.yml

# Delete cluster
gcloud container clusters delete devopstar-gke-clst-1 \
    --region australia-southeast1 \
    --project arctic-bee-236107
The only resource that will remain is the GCR image. It's up to you if you want to delete it or not.
# Syntax
gcloud container images delete [HOSTNAME]/[PROJECT-ID]/[IMAGE]:[TAG] --force-delete-tags

# Example
gcloud container images delete asia.gcr.io/arctic-bee-236107/asm3:latest --force-delete-tags