Building a Serverless Resume with AWS Amplify
AWS Amplify is a JavaScript library for frontend and mobile developers building cloud-enabled applications.
The service offering from all the major cloud providers have become pretty massive; everyday it feels like new services are coming on board and as a developer is can feel difficult at times to know what services should be used to build lightweight & scalable apps.
AWS Amplify
Amplify provides a dead simple interface into orchestrating cloud native applications through a set of declarative interfaces into a bunch of commonly used services and features that are generally required for web/mobile apps to be successful.

Goal
Over the course of this post we’ll be building out a Serverless Resume that will have its cloud architecture entirely abstracted through the use of the Amplify SDK.
- All data that is displayed will be exposed over GraphQL schemas which will also be managed by Amplify.
- Site will be hosted in an S3 bucket and this is obviously also managed by Amplify
Setup Project
You have two options for how you can approach deploying the project.
- From Scratch - You might need to do some manual copying of site code later on. There might be some room for mistakes if you’re a beginner to programming / ReactJS.
- Use Existing - The recommended way to get things up and running fast.
From Scratch
Make sure you have NodeJS installed and preferably also a good IDE to program with. I always recommend VSCode. Run the following commands in order to create a brand new react project along with installing the Amplify CLI tool
npm i -g @aws-amplify/cli
npx create-react-app aws-amplify-resume
cd aws-amplify-resume
Optional: Replace the public and src folders in the project with the folders from the aws-amplify-resume repository.
Open up the package.json file and ensure the following dependencies are listed
  "dependencies": {
    "aws-amplify": "^1.1.19",
    "aws-amplify-react": "^2.3.0",
    "react": "^16.8.2",
    "react-dom": "^16.8.2",
    "react-scripts": "2.1.5"
  },
Use Existing
Start by pulling down the project repository from https://github.com/t04glovern/aws-amplify-resume. You can clone it using the git clone command as follows
git clone https://github.com/t04glovern/aws-amplify-resume
Ensure you have NodeJS installed and preferably also a good IDE to program with. I’ve always recommend VSCode. Run the following commands from within the project folder in order to install the Amplify CLI tool and remove the existing configuration.
npm i -g @aws-amplify/cli
amplify delete
Note: if you have issues with the amplify delete command; use the From Scratch method instead.
Amplify Init
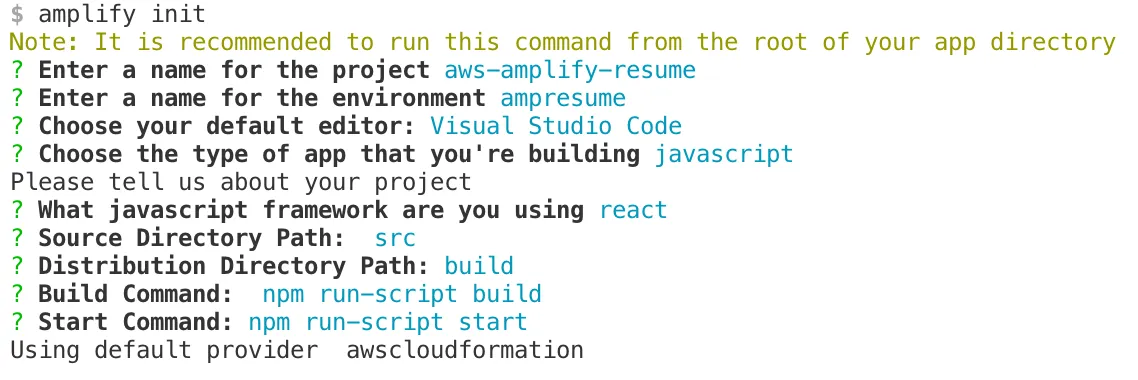
Begin by initialising Amplify within our project. This is done by running the following command and then supplying the option set shown.
amplify init
Once completed, you’ll receive information about the commands that can be executed now.
- amplify status - shows what you’ve added already and if it’s locally configured or deployed
- amplify category add - will allow you to add features like user login or a backend API
- amplify push - will build all your local backend resources and provision it in the cloud
- amplify publish - will build all your local backend and frontend resources (if you have hosting category added) and provision it in the cloud
GraphQL API
Firstly and API of some kind is required to expose our resume data. Traditionally we might have created a database of some kind, then we’d have to create some middleware service that we could use in order to perform CRUD operations on the data within the database… But we’re using Amplify so this entire process is wrapped up nicely for us!
Run the following command to create a new api
amplify add api

When you prompt that you’d like to edit the schema you’ll need to copy in the following GraphQL schema to the file that opens up for you in VSCode. If you can’t find the file it should be located in amplify/backend/api/<api_name>/schema.graphql
type Job @model {
  id: ID!
  position: String!
  company: String!
  location: String!
  dates: String!
  summary: String!
  accomplishments: [String]
  competencies: [String]
}

type Detail @model {
  id: ID!
  name: String!
  profession: String!
  location: String
  certified: Boolean!
  citizenship: String
  birthday: String
  email: String
  site: String
  phone: String
  github: String
  stackoverflow: String
}
This schema will provide us two databases we can store data about our Job and general Contact details in. The ! after the data types indicates that the type is required when inserting a new item. [] around the type just mean and array of items.
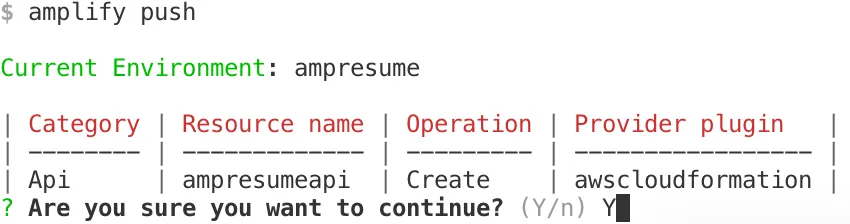
Now that we’re happy with our schema lets push it and spin up our API
amplify push

## If you update the schema
amplify api gql-compile
amplify push
You might be prompted to confirm, and also provide an AWS CLI profile.
You will next need to just inform amplify-cli where your project code sits, along with telling it where using javascript.

Amplify will begin to spin up all your resources for you using CloudFormation on the backend, following that you’ll be presented with a GraphQL endpoint and an API Key.
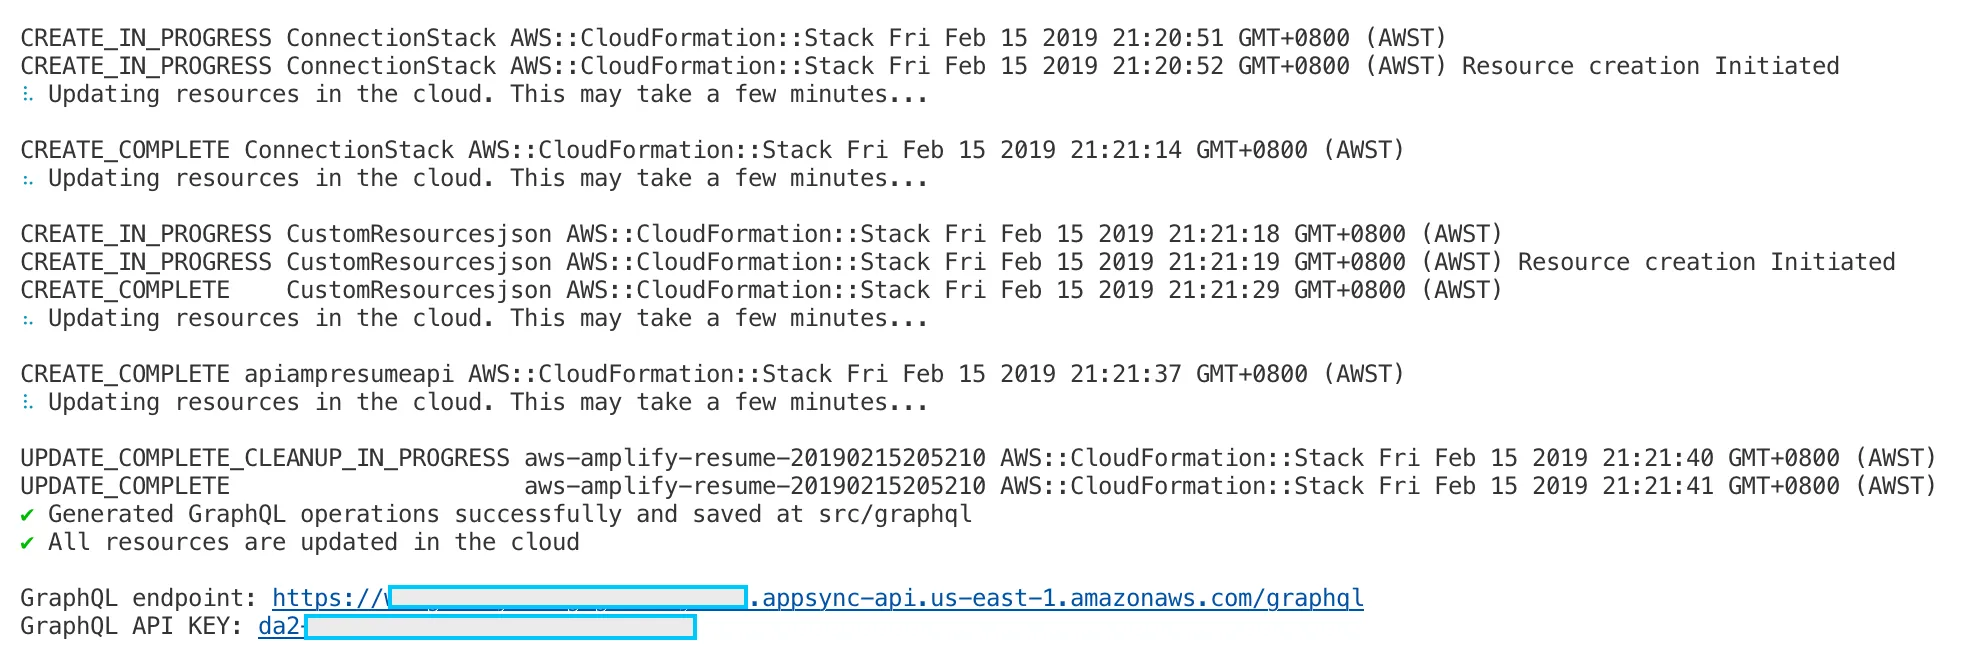
Don’t worry too much about noting this information down as you should find that its been populated for you in src/aws-exports.js
const awsmobile = {
    "aws_project_region": "us-east-1",
    "aws_appsync_graphqlEndpoint": "https://xxxxxxxxxxxxxxxxxxx.appsync-api.us-east-1.amazonaws.com/graphql",
    "aws_appsync_region": "us-east-1",
    "aws_appsync_authenticationType": "API_KEY",
    "aws_appsync_apiKey": "da2-6rkv7tfouxxxxxxxxxxxxxxx"
};
GraphQL Data Populate
To being using the endpoint we’ll add some sample data to our DynamoDB instances using their new GraphQL endpoint. Navigate to the AWS AppSync service page, open up your API and then head over to the Query panel for the API.
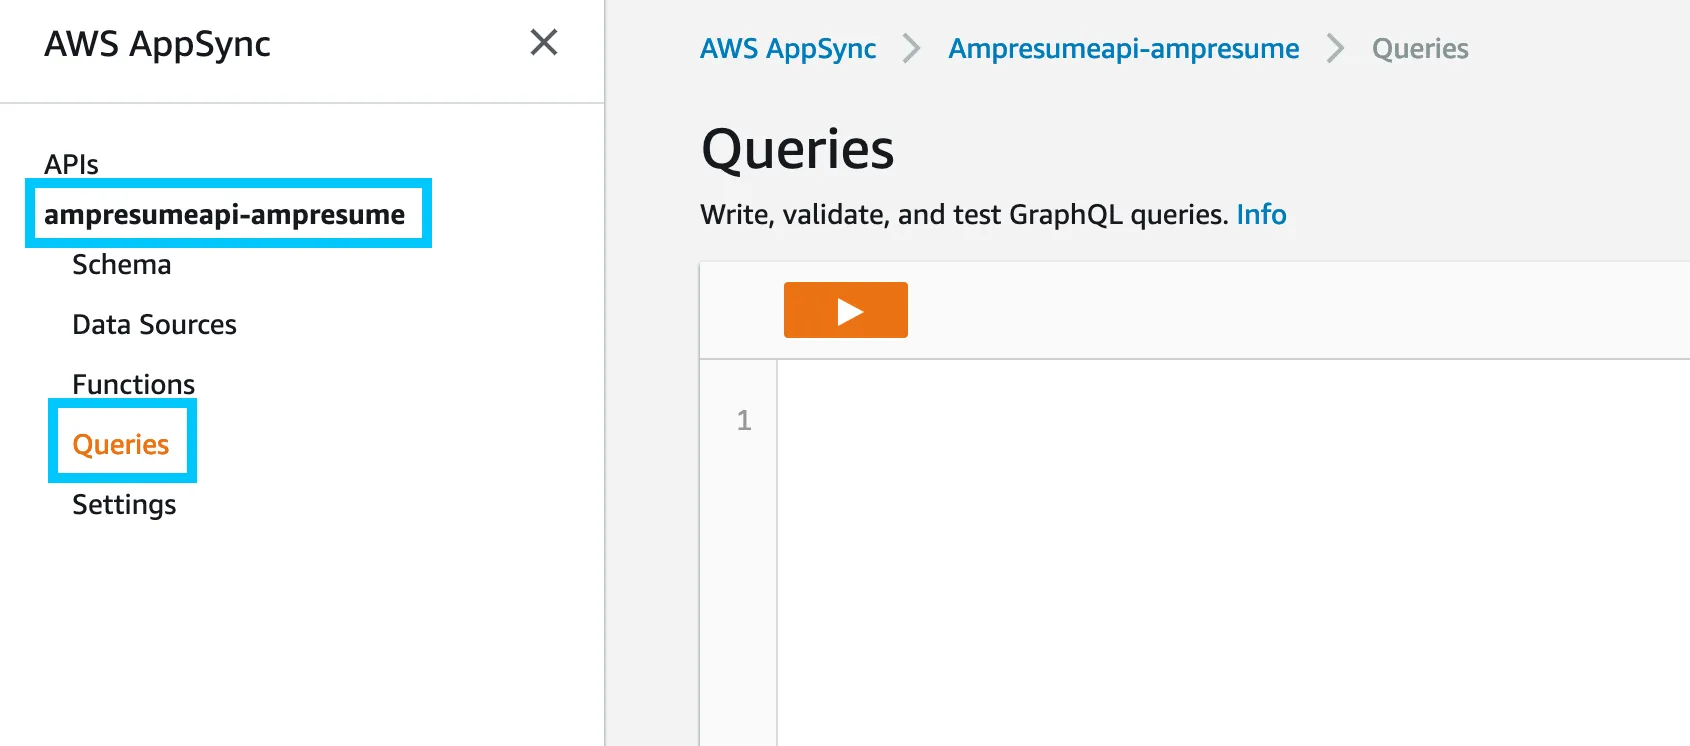
Inside the query box, run each of the queries below.
mutation CreateJob {
  createJob(input: {
    id: 1,
    position: "Software Engineer",
    company: "DevOpStar",
    location: "Perth, Western Australia",
    dates: "August 2017 – Current",
    summary: "Building an awesome blogging platform!",
    accomplishments: [
      "Accustomed to an agile deliver",
      "Embedded software and hardware design and implementation",
      "Continuous integration across infrastructure and software pipelines.",
      "AWS orchestration of developer workflows through the targeted usage of AWS CloudFormation & Terraform."
    ]
    competencies: [
      "CloudFormation",
      "CodeBuild / GoCD",
      "Docker",
      "Kubernetes",
      "ReactJS",
      "Springboot"
    ]
  }) {
    id
    position
    company
    location
    dates
    summary
    accomplishments
    competencies
  }
}
 mutation CreateDetail {
  createDetail(input: {
    id: 1,
    name: "Nathan Glover",
    profession: "Technology Enthusiast",
    location: "Perth, Western Australia",
    certified: true,
    citizenship: "Australia",
    birthday: "31.12.1990",
    email: "contact@devopstar.com",
    site: "devopstar.com",
    phone: "+61 000 000 000",
    github: "t04glovern",
    stackoverflow: "nathanglover"
  }) {
    id
    name
    profession
    location
    certified
    citizenship
    birthday
    email
    site
    phone
    github
    stackoverflow
  }
}
Note: In the rare case that your mutators are called something else other then createDetail and createJob you can find what they’re called in src/graphql/mutations.js.
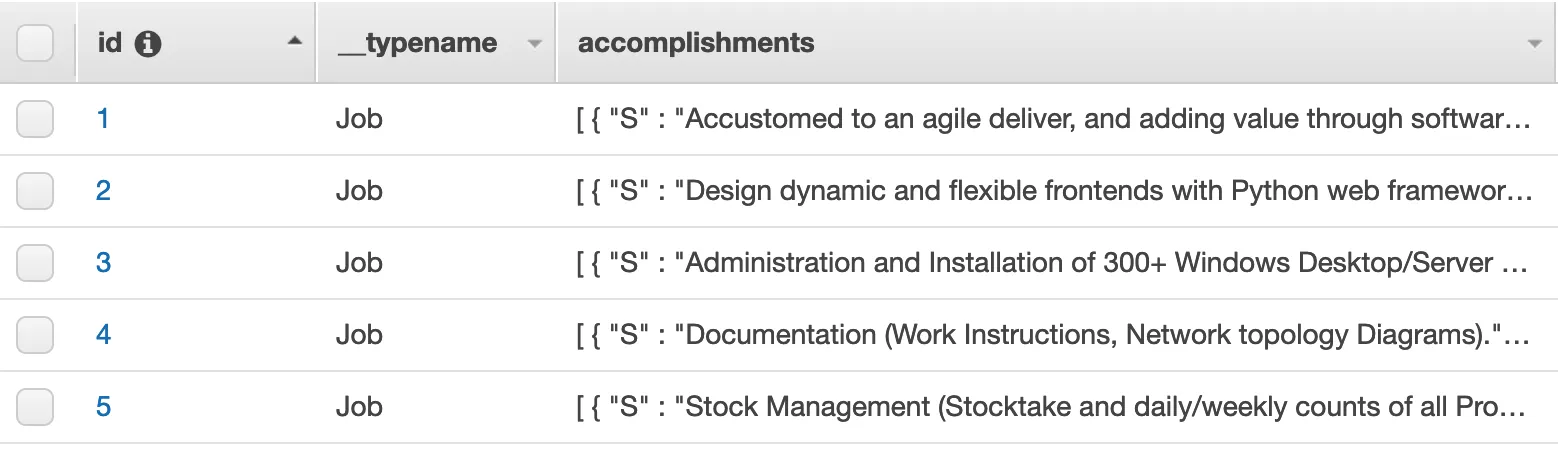
Once these mutations have been executed you can view the data was added successfully by browsing the Detail or Job tables on the DynamoDB dashboard. Feel free to add more entires based on the Template found here
React Project Test
Hopefully if you followed along you should just be able to build and deploy the site in its current state, however we’ll go ahead and test to make sure. Run the following commands to install the project dependencies and run it in dev mode.
npm install
npm run start
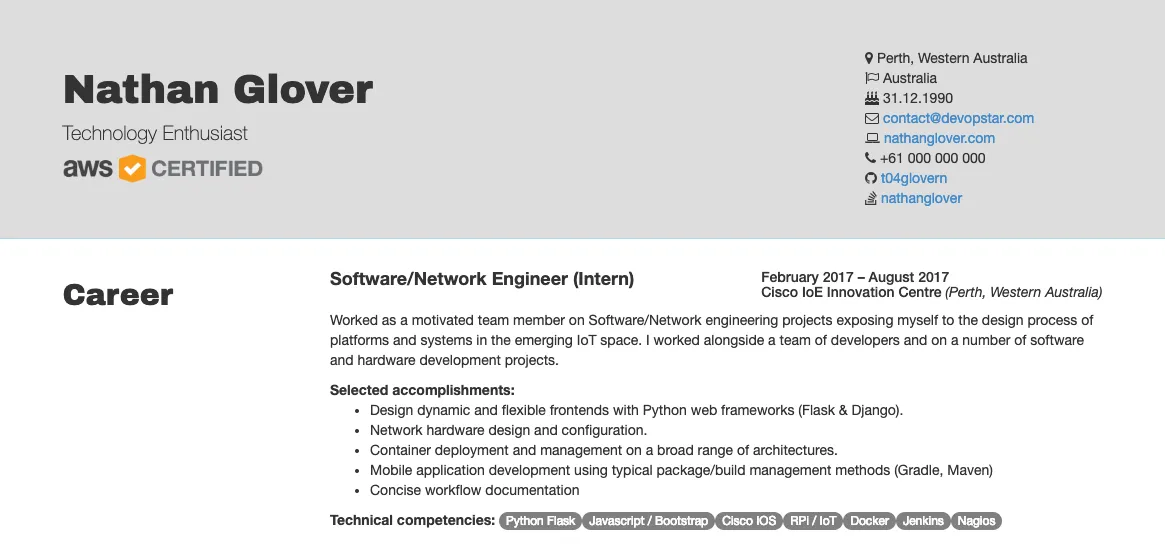
Open up a browser if one doesn’t open for you and navigate to http://localhost:3000. Confirm that your resume data is showing as expected.
If it isn’t some things to check:
- src/components/sections/Header/Header.jsx - confirm that the
graphqlOperationused for getting resume details is using the correct query name; and passing in the correctIDyou set (should be 1) - src/components/sections/Career/Career.jsx - confirm that the
graphqlOperationused for getting the list of Jobs is correct based on the query name in thesrc/graphql/queries.jsfile
Amplity Hosting
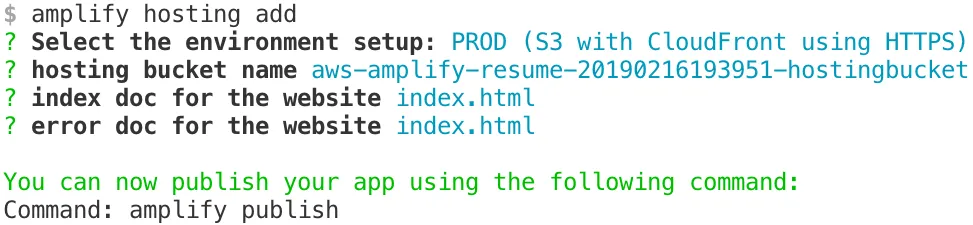
The final part of this tutorial is to add static hosting for our resume which can be done easily using the Amplify function for adding hosting
amplify hosting add
amplify publish
Note: I used CloudFront in the tutorial however I would recommend selecting DEV and opting to just using S3. Your bucket name is also going to be different (it needs to be).
Once the deploy has completed your site should automatically be built and pushed to S3. Once that has completed your sites hosting URL should be displayed. Navigate to it in your browser and check our your brand new serverless resume!